| Home > My 1976 Mazda RX-5 Cosmo Restoration |
| Home > My 1976 Mazda RX-5 Cosmo Restoration |
| Go Directly To The Videos! |
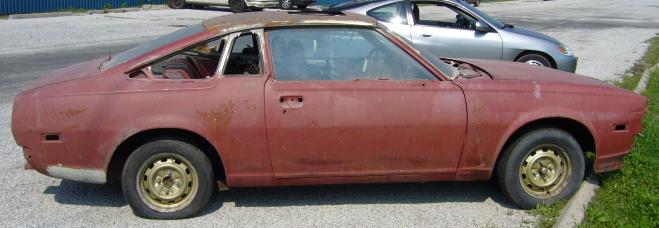
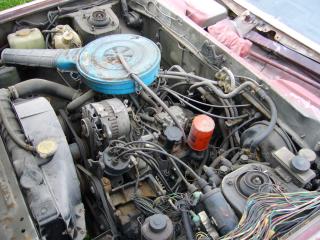
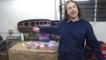
In September 2007, I was driving past a local wrecking yard on the way to a customers place when I noticed what at first appared to be an old Datsun sitting out front, ready to be crushed. As I circled around I realized that it wasn't a Datsun at all, as in the trunk I could see a distinct baby blue "Mazda Rotary Engine" air cleaner. What was it? An RX-3? An RX-4? No, not quite. It was an RX-5 Cosmo!
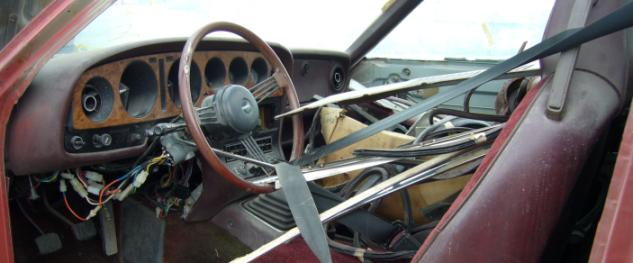
Immediately I went into the office and started asking about the car. They were amazed that someone was interested in "that old Mazda", and were happy to sell it to me as long as I understood the sale was "as is". "As is" was an apt description becuase the car appeared to be halfway through an a paint job, in primer, with much of the trim and exterior components removed. It took about a week for them to track down the registration but soon enough the car was in my posession. At the time I had several other projects on the go (not the least of which was Project Tina) so the car sat in storage, waiting.
 Almost exactly three years later, in September 2010, it was towed to my shop and I begain work. My vision for the car is both restoration and modernization, known to some as "restomodding". The idea is modernize and modify the car, but at the same time, not destroy the originality and feel of the vehicle. To accomplish that, my goals are to smooth out the body lines, remove the excessive trim (and there is a lot of it), fix any of the mechanical issues, convert many of the manual functions to power and upgrade the 13B 4 port rotary to a 13B 6 port fuel injected and turbocharged rotary. The paint decision has not quite been finalized though I am looking towards a dark metallic blue with a complimentary dark marron interior, and of course a nice set of wheels in the 18" to 19" range. Additionally, I'll be improving both the ride and handling with an air suspension.
While this is far from my first automotive project, it is my first restoration project involving everything from mechanicals, to sheet metal, to upholstry. Additionally it has become a bit of a scavenger hunt as there were very few of these vehicles sold in North America. Some estimates are as low as about 60 Cosmos from 1976-1978, but more realistically it is probably a few hundred.
I have decided that instead of creating lengthy writeups full of pictures like I did with my RX-7, I will document this project by making a series of videos covering the process. I am releasing these videos and posting them to YouTube regularily as the project progresses. If you want to follow the project you can subscribe to my YouTube channel or check back here often to view new videos as they are posted below.
| The Restoration Videos |
| Monday, September 20, 2010 | Part 1: My 76 Mazda RX-5 Cosmo Restoration - Initial Cleanup | ||
 |
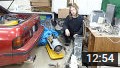
This is part 1 of a series of videos detailing the resto-modding of my 1976 Mazda RX-5 Cosmo project car. Purchased from a local wrecking yard in Sept. 2007 and stored until Sept. 2010, the car was someone else's abandoned project. I got it with body work half complete and in primer, with much of the interior and exterior disassembled. I'm resto-modding the car with some modern touches while remaining true to the original car. In this video, the car is cleaned out after being brought to my shop (yeah, there's like 5 minutes of vacuuming, but it's entertaining). There were approximately 60 of these cars sold in North America! | ||
|
|
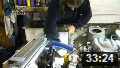
| Monday, September 27, 2010 | Part 2: My 76 Mazda RX-5 Cosmo Restoration - Engine Removal | ||
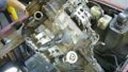 |
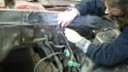
This is the 2nd set in a series of videos covering the restomodding of my 1976 Mazda Cosmo. In this video, the engine is stripped down and removed from the car along with the transmission. There isn't really anything wrong with this 4 port 13B, but the car needs a little more power (stock is about 120HP) so I will be using this engine to build a 6 port 13B turbo using the Cosmo housings and GSL-SE end plates. | ||
|
|
| Tuesday, October 05, 2010 | Part 3: My 76 RX-5 Cosmo Restoration - Rotary Engine Disassembly And Cleaning | ||
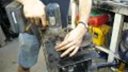 |
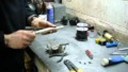
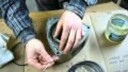
Part 3 of my Cosmo restoration shows disassembly of the 4 port 13B rotary engine and the beginning of the long process of cleaning the internal engine parts. At first I was quite worried about the condition of the engine after looking through the exhaust ports, but as soon as I opened it up I was pleasantly surprised. | ||
|
|
| Monday, October 11, 2010 | Part 4: My 76 Mazda RX-5 Cosmo Restoration - Engine Cleaning Continued | ||
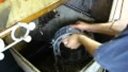 |
In part 4 of my Cosmo restoration, I continue cleaning the engine components, a task which was started in the last video. It is actually quite involved to clean and inspect the internal engine parts and it can easily take more time then it does to disassemble and build the engine. While I did clean all the parts from the 4 port Cosmo 13B, I will only be using the housings, oil pan and a few other components. The rest of the engine will be the irons and rotating assembly from a GSL-SE 13B. | ||
|
|
| Sunday, October 24, 2010 | Part 5: My 76 Mazda RX-5 Cosmo Restoration - Shaving Holes and Minor Floor Repair | ||
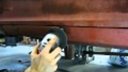 |
I'm taking a little break from engine work, so part 5 of my 76 RX-5 Cosmo restoration deals with some minor body work. In this video I shave the antenna and sill trim holes, then repair a small hole in the floor. At the end, there is a rather unpleasant surprise... | ||
|
|
| Monday, November 08, 2010 | Part 6: My 76 Mazda RX-5 Cosmo Restoration - Floor Repair Prep and Blasting | ||
 |
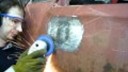
After discovery of the large hole in the drivers side floor, it became clear that the sheet metal needed some major repairs. So part 6 deals with stripping down the floor to get a clear view of what needs to be repaired and to prep for the actual repairs. In this episode I strip out the sound deadening tar using dry ice, clean up the residue, and then sand blast the floor pan. | ||
|
|
| Saturday, December 04, 2010 | Part 7: My 76 Mazda RX-5 Cosmo Restoration - Intake and Exhaust Porting | ||
 |
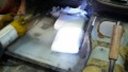
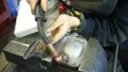
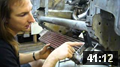
Has it been nearly a month since my last episode? Wow, time does indeed fly. I've been quite busy preparing to build the engine. So in part 7, I cover the intake and exhaust porting. The engine is being built with GSL-SE 6 port plates and the Cosmo rotor housings as the basis for a 6 port turbo setup. This port job is fairly conservative, only opening up the primary ports a little and bringing the exhaust ports close to 2nd gen RX-7 specs. The goal is to maintain fuel economy, low and midrange torque, and idle quality. This episode covers everything involved in porting including: marking out the new ports, grinding the port shape, smoothing the bowls, smoothing port to runner transitions, smoothing the runners, grinding and blending the exhaust ports. | ||
|
|
| Thursday, December 23, 2010 | Part 8: My 76 Mazda RX-5 Cosmo Restoration - Engine Hole Tapping and Painting | ||
 |
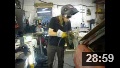
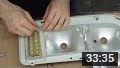
It's a Festivus miracle that I now present Episode 8 of my Cosmo restoration. Now that the engine is fully ported, episode 8 deals with the final prep of those engine parts before engine assembly. In this episode the rear iron and water pump housing are tapped for sensors and fittings, and then all the engine parts are glass bead blasted and then painted with POR-15's engine enamel. Also included: adapting S4 water pump housing to older 13B, tapping rear iron for turbo coolant feed, masking the parts for blasting and painting, final soap and water wash, watching paint dry. | ||
|
|
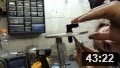
| Friday, January 14, 2011 | Part 9: My 76 Mazda RX-5 Cosmo Restoration - Shaving The Door Handles | ||
 |
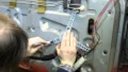
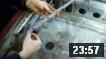
I've been doing a lot of engine work lately, so for episode 9 I change gears a little and move onto a random task: shaving the door handles. This involves installing a solenoid into the door which will now electrically activate the door latch, and then removing the exterior handle holes from the door. What I thought was a quick task turned out to be more time consuming than I thought due to the difficulty of working inside the door and my lack of sheet metal talent. Included in this episode: installing AutoLoc 50LBs shaved door solenoids, modifying solenoid bracket to fit doors, setting up a pulley mechanism, modifying stock door latches for shaved doors, door window removal, wiring the solenoids, cutting out sheet metal patches for the door handle holes. | ||
|
|
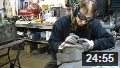
| Wednesday, February 02, 2011 | Part 10: My 76 Mazda RX-5 Cosmo Restoration - Shaved Door Sheet Metal | ||
 |
In part 10 of my 1976 Mazda Cosmo restoration, I continue the surprisingly long task of shaving the door handles. Last episode I left off after cutting the patch panel to fill the hole in the passenger door. This time I weld the panel in, fix the huge amount of warpage my improper welding technique caused, then do the same on the passenger side. Shaving the door handles took a lot more time than I thought it would and it feels nice to have it all finally done. Included in this episode: patching door handle holes, welding sheet metal, grinding down welds, hammering out warp caused by welding, learning how to not screw it up next time. | ||
|
|
| Tuesday, February 22, 2011 | Part 11: Power Windows Installation - My 76 Mazda RX-5 Cosmo Restoration | ||
 |
I now present episode 11 of my '76 Mazda RX-5 Cosmo restoration. This episode deals with the task of installing the AutoLoc PW4650 universal power window kit. This kit includes motorized actuators which rotate the existing manual window cranks, driving the manual regulator and thus converting it to power without the need to fit an entirely new window regulator. Additionally it includes all wiring and switches (not installed yet), and mounting brackets. As it is a universal kit, it is universally wrong for every application and must be customized to fit. The installation was straightforward though time consuming. I have to admit, this episode is a monstrosity and quite a bit longer than normal. But for good reason, because I didn't want to do a "To be continued" as the next episode will be quite special. Included in this part: custom fitting AutoLoc universal power window actuators, making cutting channels into the inner door for space, patching and finishing off the channels with welding and sheet metal, cutting sheet metal from templates, media blasting before painting, making brackets for actuators, a surprise at the end. | ||
|
|
| Thursday, March 10, 2011 | Part 12: 13B Rotary Engine Rebuild - My 76 Mazda RX-5 Cosmo Restoration | ||
 |
Just as I promised last episode, it is finally time to build the engine! Part 12 of my RX-5 Cosmo restoration covers the entire process of building the 6 port 13B Mazda rotary engine. While this engine is a hybrid of GSL-SE RX-7 and Cosmo parts, the process is the same for any rotary from a 12A to a 13B NA, 13B Turbo, 13B-REW or any other variant of the 13B. This video shows the whole process of the engine build, starting from measuring the rotors and covering everything else including clearancing the side seals, assembling the rotors, complete assembly the short block, setting the eccentric shaft end play and installing the front cover and everything underneath it. It's probably the most complete engine build video outside of what you can buy from the vendors, and as such, is an hour long. After this one, I'm going back to videos under 20 minutes. But for now, grab a beverage of your choice, sit back, and enjoy. | ||
|
|
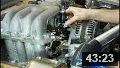
| Monday, April 04, 2011 | Part 13: Clearing The Engine Bay - My 76 Mazda RX-5 Cosmo Restoration | ||
 |
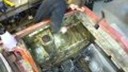
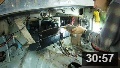
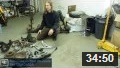
With the engine built, it seemed logical to focus a bit on where that engine is to live: under the hood. Episode 13 has me stripping all the remaining mechanical components out of the engine bay in preparation for it to be blasted, repaired and painted. This is dirty grunt work, not particularly stimulating but at least it isn't sheet metal. It's been a while since my last update and rest assured, what you see here is only a small fraction of what has been done. I have plenty more footage ready to edit. Included in this episode: removing all engine bay mechanical components, removing brake lines and cylinders, labelling and removing wiring harnesses, removal of the steering gear, orderly disassembly of an engine bay. | ||
|
|
| Monday, April 18, 2011 | Part 14: Oil Pan! Engine Bay! Floor! - My 76 Mazda RX-5 Cosmo Restoration | ||
 |
Part 14 of my '76 RX-5 Cosmo restoration is a collection of three random tasks. First, I add a -10 AN fitting to the oil pan to serve as a turbo oil drain. Next, I continue stripping down the engine bay by scraping off the undercoating and then cleaning off the residue with kerosene. Finally, I begin some of the work on the floor by patching a small area on the drivers side of the transmission tunnel. Included in this episode: drilling a turbo oil drain hole in the oil pan, TIG welding a -10 AN flare to the pan, scraping engine bay undercoating, trying to clean it with Castrol Super Clean, cleaning the residue with kerosene, finding a few rust holes, cutting out a rusted area of the transmission tunnel, fabricating a patch panel, welding it in place, grinding the welds. | ||
|
|
| Friday, May 13, 2011 | Part 15: Repairing The Transmission Tunnel - My 76 Mazda RX-5 Cosmo Restoration | ||
 |
Happy Friday everyone! It's been a little while since my last video as I've been busy with beginning-of-season related activities: built a new air compressor for the shop, put a new diff in my RX-7 and helped someone else with an engine installation. It's taken a while to edit episode 15 (the actual work was completed in March) but it's finally here! In part 15, I repair the rust damaged areas of the transmission tunnel discovered during blasting. The sheet metal surrounding the shifter hole and parking brake handle area is cut out, patch panels are made and then welded into place. Also a cracked driver side seat mount is repaired. Sheet metal work is time consuming though not necessarily difficult and this is only a little work of much to come. Included in this episode: cutting out rusted metal, making templates, cutting patch panels, forming patch panels, welding in patch panels, blasting rusty parts, repairing damaged brackets, removing spot welds and replacing, lots of grinding. | ||
|
|
| Sunday, June 19, 2011 | Part 16: Front End Disassembly, Wheel Well Un-Gooing, Dash Removal - My 76 Cosmo RX-5 Restoration | ||
 |
I finally present part 16 of my Cosmo restoration! Has it really been over a month since the last update? I guess I've been busier than I thought and haven't had as much time to work on the car as I would have liked. Regardless, work has been slow and steady when I could find a few minutes here and there to spend in the shop. The work that has been accomplished lately has mainly been grunt work, as shown. In this episode I disassemble the front end, revealing the need for more rust repairs. The front subframe is removed before the wheel wells are cleaned up in preparation for media blasting. Then since I've been putting it off for months, the dashboard is removed as well as under dash components. Included in this episode: front fender removal, nose cone removal, front subframe removal, stabilizer bar removal, scraping wheel well undercoating, undercoating removal with kerosene, rust, dash board removal, heater core removal, heater components disassembly. | ||
|
|
| Tuesday, July 26, 2011 | Part 17: My 76 Mazda RX-5 Cosmo Restoration - Rear Passenger Floor Sheet Metal Repair | ||
 |
Episode 17 of my '76 Mazda RX-5 Cosmo restoration moves from the destruction of the last episode to construction as I focus mainly on one task: repairing the floor in the rear passenger seat area. This was some of the surprise damage I found while sand blasting way back in part 6. I've been neglecting the floor for more interesting tasks and because rust is depressing but after uncovering far more tin-worm damage in part 16, I decided it was time to do a little more sheet metal work. This turned out to take longer than I thought and was a rather tedious area to work in. Included in this episode: cutting out rusty sheet metal, cleaning up rust, prepping the areas for repair, fabricating patch panels, media blasting, hand forming patch panels, welding in new metal patch panels, recreating factory beads without a bead roller, corpse removal. | ||
|
|
| Monday, September 05, 2011 | Part 18: Floor, Frame, Firewall - My 76 Mazda RX-5 Cosmo Restoration | ||
 |
It's time finally for part 18 of my Mazda RX-5 Cosmo restoration. In episode 19 I continue repairing the rear floor pan, this time dealing with the drivers rear seat area as well as some of the bulkhead and frame below it. Once tired of messing about with floor pans, I move onto some easy sheet metal work involving filling some of the unnecessary holes in the firewall. Included in this episode: cutting out rusty sheet metal, cleaning up rust, prepping the areas for repair, fabricating patch panels, hand forming patch panels, welding in new metal patch panels, smoothing a firewall, fixing sheet metal weld distortion, a tornado. | ||
|
|
| Monday, December 05, 2011 | Part 19: Front Inner Fender Removal, POR-15, Rear Sill Repair - My 76 Mazda RX-5 Cosmo Restoration | ||
 |
Part 19 of my '76 RX-5 Cosmo restoration continues with sheet metal repairs, but hopefully in a less boring format. First off I totally remove the rotted out front inner fenders by drilling out about a billion spot welds. Then we move onto the very complicated rear inner sill repair. This brings the introduction of POR-15, the first time I have used it on this project and by far, not the last. Included are many tips on working with this product. I promised less sheet metal, but wanted to show the rear inner sill repair because it was by far the most complicated sheet metal repair I have yet done on this car, and likely will remain as such. Included in this episode: drilling out spot welds, air hammering off panels, using MetalReady to prep for POR-15, applying POR-15, POR-15 usage tips, cutting out floor to access rear inner sill, fabricating a new rear inner sill panel, welding it all back into place, nudity of me. | ||
|
|
| Sunday, December 25, 2011 | Part 20: Media Blasting The Front End - My 76 Mazda RX-5 Cosmo Restoration | ||
 |
Merry Christmas everyone! It's about that time in the day where one starts to get tired of their crazy extended family, so to brighten the mood with a distraction, here's Episode 20 of my '76 Cosmo Restoration. In part 20, I media blast the front end and engine bay, removing 35 years of rust, gunk and dirt. Then POR-15's MetalReady is used to preserve the freshly blasted sheet metal and prevent surface rust from forming while the repairs are performed. So grab that new tablet or laptop, sit down with an adult beverage and enjoy. Included in this episode: making a blasting tent to contain the mess, info about media blasting, blasting the front end including inner fenders, wheel wells, frame and engine bay, and using MetalReady to prevent flash rust on the fresh metal. | ||
|
|
| Thursday, April 05, 2012 | Part 21: Front Sheet Metal Extravaganza 1 - My 76 Mazda RX-5 Cosmo Restoration | ||
 |
Part 21 is finally here! It's been quite a while since the last episode, and a lot has been accomplished. Not quite as much as I would have expected due to a busy time of year. After a trip to Jamaica at the beginning of February kept me out of the shop for two weeks, we entered auto show season with an auto show every weekend until mid March. Now that's over with, I've been able to get back down to the oh-so-fun sheet metal work. This episode focuses on the mass amount of front end sheet metal repairs in the fender and passenger foot well/sill area. Episode 21 is actually only the first part to this set of repairs, which we will finish off in part 22. And after that, no more sheet metal for a while! I promise! Included in this episode: cutting out rusted metal, drilling spot welds, loads of patch panel fabrication, welding it all together, weld through primer, POR-15, grinding. | ||
|
|
| Monday, June 04, 2012 | Part 22 - Front Sheet Metal Extravaganza 2 - My 76 Mazda RX-5 Cosmo Restoration | ||
 |
Part 22 of my '76 Mazda RX-7 Cosmo restoration finishes up the passenger side front sheet metal. In this episode I reconstruct the passenger front inner and outer sill, floor and kick panel. And the great thing is that as promised, this is the last sheet metal episode for a long, long time! While I have the same set of repairs to do on the driver side, that will all be done off camera so that the next episode gets to the good stuff. Included in this episode: making templates, fabricating patch panels, POR-15, cutting, grinding, welding, floor pan repair. | ||
|
|
| Wednesday, November 21, 2012 | Part 22.5: Updates, Q and A, Misc - My 76 Mazda RX-5 Cosmo Restoration | ||
 |
June, July, August, September, October and November; Hey, I wasn't kidding when I said in episode 22 that it would be a bit of a wait for the next one! In that time I've been as hard at work on the Cosmo as I could manage, which unfortunately is not as much as I would have liked. It's been a busy summer with plenty taking me out of the shop. Even still, I've been working as much as I can and have picked up the pace over the last two months to the point where the driver side sheet metal is almost done. So what's in this episode, strangely titled as "Part 22.5"? Well, with the help of my special guest Rose Cora Perry, I answer some of the most common questions about the project. And along the way, there are a few tips and tricks thrown in, as well as a little bit of why the driver side repairs have taken so long. This episode is a little different, so I hope you enjoy... | ||
|
|
| Sunday, February 03, 2013 | Part 23: Middle Intake Manifold Fabrication - My 76 Mazda RX-5 Cosmo Restoration | ||
 |
After part 22.5 was posted, it took the remainder of November and December to finish the driver side sheet metal. I worked my butt off to get it done before January 1st, and indeed, accomplished that task so I was able to start the new year sheet metal free! So I am happy to say that episode 23 is sheet metal free! In this episode I fabricate the parts necessary for my unique combination of intake manifolds, combining an FD RX-7 upper intake with an GSL-SE RX-7 lower intake. Doing so requires the fabrication of a custom middle intake manifold out of aluminium, complete with provisions for secondary fuel injectors. You'll see me build flanges from scratch (using my new drill press), measure and cut intake runners, TIG weld it all together, port match the flanges to the gaskets and runners, install injector bungs, curse at the difficult welding I caused, add -6 AN bungs to a stock RX-7 primary fuel rail, and build a fuel rail for the newly fabricated manifold. I'd like to thank DIYAutoTune for supporting this project and providing some of the parts used in this episode. | ||
|
|
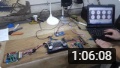
| Sunday, March 17, 2013 | Part 24: MegaSquirt MS3-Pro Installation - My 76 Mazda RX-5 Cosmo Restoration | ||
 |
Part 24 of my '76 Cosmo restoration is here! And I'm going to come right out and warn you; this is a long one. There is a lot of detail here, for you see, this episode covers in it's entirety the installation of the MegaSquirt MS3-Pro EFI system. Like the engine build in part 12, I decided to cover the entire process in a way that would help anyone performing a similar installation. And while this specifically covers the MS3-Pro, all the information is valid for any MegaSquirt installation and indeed, any other brand of standalone as well. In this episode you'll see from scratch the MS3-Pro installation from bare engine bay to fully wired and functional EFI system. Included is detailed coverage of making an ECU mounting panel, wiring in all the injectors and sensors, wiring up the 2nd gen RX-7 CAS and coils, boost solenoid, e-fan relays and other EFI related accessories. So pour yourself a big drink, get comfortable, and enjoy. A huge thanks goes out to DIYAutoTune for providing the MS3-Pro and other parts used in this installation. | ||
|
|
| Saturday, April 20, 2013 | Part 25: Turbo Manifold Fabrication - My 76 Mazda RX-5 Cosmo Restoration | ||
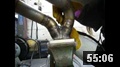 |
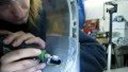
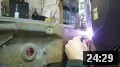
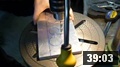
Episode 25 of my '76 Mazda RX-5 Cosmo restoration is another long one, covering in its entirety the fabrication of the turbocharger manifold. Suddenly the engine bay started to look a little cramped when I began to position the GT3076R, so it took some plumbing to build the required manifold. Constructed out of 1.5" SCH40 304 stainless steel pipe, it was fully TIG welded with an argon back purge. Yes, this is another long episode because I wanted to show the manifold fabrication process in glorious detail so that this video would be a useful resource for anyone wanting to build a custom turbo manifold. So as I say, grab your favourite adult beverage, sit back, and enjoy. Included in this episode: fabricating a 13B exhaust flange, fabbing a merge collector, positioning a turbo in the engine bay, measuring, cutting and fitting stainless pipe and els, tacking in position, setting up a back purge, final welding, port matching, custom heat shields. A huge thank you to ATP Turbo for helping out with some of the parts used in this episode. | ||
|
|
| Thursday, June 27, 2013 | Part 26: Exhaust System Fabrication - My 76 Mazda RX-5 Cosmo Restoration | ||
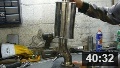 |
With the turbo manifold finished and the turbocharger installed, it seemed logical to continue on that route and finish the rest of the exhaust. So in part 26 of my '76 Mazda Cosmo Restoration, I do just that. Starting with the downpipe, I build the full stainless steel exhaust piece by piece to include a catalytic converter, resonator, middle muffler and rear muffler. It was a bit of challenge to fit all that equipment under a car never designed to contain it, however I believe I have achieved my goal of an above OEM quality, long lasting and quiet exhaust system. In this episode you'll see me: build a downpipe, cut and fit tubing, weld to a v-band, build a midpipe with O2 sensor bung and flanges, position exhaust components, cut tubing bends to fit resonator and mufflers, loads of TIG welding, set up exhaust hangers. | ||
|
|
| Saturday, August 24, 2013 | Part 27: Cooling System - My 76 Mazda RX-5 Cosmo Restoration | ||
 |
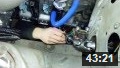
In part 27 of my '76 Mazda RX-5 Cosmo restoration, I focus on the cooling system. It seemed an appropriate thing to do with the hot summer weather. The stock Cosmo rad was leaking, small and hard to obtain so I installed a universal aluminum radiator after modifying it to fit. With the new rad, the oil cooler had to be relocated, the engine water inlets/outlets modified, and a number of other changes had to be made. Once all that was done, it was time to install the dual cooling fans. Now that the cooling system is new, modern and overbuilt, I should have no problems even under the worst conditions. Included in this episode: modifying a universal rad to fit, TIG welding brackets, making oil cooler brackets, MIG welding them in place, modifying thermostat and water pump housing, mounting the oil cooler, trimming and modifying an electric fan shroud to fit the rad, welding mounting fan mounting brackets, wiring up the e-fans, testing the fans. | ||
|
|
| Monday, September 23, 2013 | Part 28: Front Inner Fender Reinstall & Using POR-15 - My 76 Mazda RX-5 Cosmo Restoration | ||
 |
Episode 28 of my '76 Mazda RX-5 Cosmo restoration is a sheet metal episode. Yes, I said sheet metal. In this episode I repair and reinstall a new set of front inner fender panels (removed all the way back in part 19). I was able to acquire another set in far better condition and they have been sitting in the car for several months. While I was waiting for other unrelated parts to arrive (perhaps a hint for next episode?) I decided to tackle the inner fenders as it is one of the last major sheet metal repairs and thus a big milestone in the project. And I was reminded of how much I don't enjoy sheet metal work. So to make the episode a little more interesting, I took the opportunity to include some great info on how to use POR-15. Included in this episode: media blasting, patch panel fab, welding, grinding, hammer and dolly work, fitting sheet metal panels, spot welding, using seam sealer, weld primer, prepping for POR-15, using metal ready, POR-15 tips, applying POR-15. | ||
|
|
| Sunday, November 24, 2013 | Part 29: Vintage Air Gen II Compac HVAC Install, Part 1 - My 76 Mazda RX-5 Cosmo Restoration | ||
 |
It's been a few months, so I am proud to present Part 29 of my '76 Mazda RX-5 Cosmo restoration. In episode 29 I begin the task of installing a Vintage Air Gen II Compac HVAC system. This is a universal system, so it's up to me to make everything fit in, lets face it, an application that Vintage Air has never considered. In this first part of a two part episode I mount the major mechanical parts including the compressor, condenser, drier and HVAC unit itself. As this install is turning out to be considerably more work than I had thought, and I'm not as far along as I'd like due to interruptions, I decided to split this into two parts instead of one hour long episode. Part 2 of this install will consist of all the plumbing, wiring and under-dash ducting. For now, enjoy! Included in this episode: mounting the condenser, making and welding mounting brackets, creating a mount system for the drier, clearancing the transmission tunnel to fit the HVAC unit, modifying the sheet metal, making mounting brackets for the evaporator, mounting the evaporator, welding, grinding, cutting and all that good stuff. | ||
|
|
| Monday, December 23, 2013 | Part 30: Vintage Air Gen II Compac HVAC Install, Part 2 - My 76 Mazda RX-5 Cosmo Restoration | ||
 |
Happy Festivus everyone! Part 30 of my '76 Mazda Cosmo restoration continues the Vintage Air Gen II Compac HVAC installation. In this episode I concentrate primarily on plumbing the system. I know I promised last episode that this half would finish off the install but it has been a lot of work. More than I first anticipated so you'll need to wait until episode 31 for the finishing touches (wiring and ducting). There certainly is a lot of plumbing in an HVAC system, especially when it all has to be figured out from scratch in a custom installation. But the plumbing is one of the most important parts of the install so it makes sense to pay attention to the details. Line placement in an engine bay can make or break the system. I've tried to make use of as many hard lines as possible for both the hot and cold side, which will go a long way in terms of reliability. Included in this episode: measuring and cutting high and low side hoses, installing fittings, installing firewall bulkheads, tricks for hand bending aluminium tube, the cut-and-weld method of tube bending, making brackets, silicone hoes, TIG welding. | ||
|
|
| Friday, January 24, 2014 | Part 31: Vintage Air Gen II Compac HVAC Install, Part 3 - My 76 Mazda RX-5 Cosmo Restoration | ||
 |
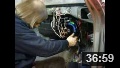
It's time for the conclusion of the Vintage Air installation on my '76 Mazda Cosmo. Yep, it's episode 31! Part 1 and part 2 covered the mechanical components and plumbing. Part 3 concentrates on wiring up the system, installing the ducting after adapting the stock Cosmo dash vents, and then powering up the system for electrical testing. I also explain a bit about how the MegaSquirt MS3-Pro handles the A/C system. It sure feels good to have it all done and I'm happy with how well I was able to integrate it into the car. Of course the final testing will have to wait until the system is charged and the car is running. Included in this episode: wiring the Vintage Air system, modifying Vintage Air harness to work with EFI/MegaSquirt, WeatherPack connectors, modifying Cosmo dash vents using Vintage Air adapters, cutting/bending/forming aluminium, electrical checks and testing. | ||
|
|
| Wednesday, February 26, 2014 | Part 32: Air Box and Coolant Recovery Tank Fabrication - My 76 Mazda RX-5 Cosmo Restoration | ||
 |
While I'm done with air conditioning, part 32 of my '76 Mazda Cosmo restoration still deals with moving air around, as I fabricate a cold airbox. After working so long on the Vintage Air system I wanted to do some simple fabrication, so the air box was a perfect choice. Made to accept a cone filter it is a true cold airbox that draws air from the inner fender. So not only will the box muffle the sound of the engine but it will also assure the turbo is drawing in the coolest air it can. Since I was in an aluminium fabbing mood after the airbox, I also continue on and build an aluminium coolant recovery bottle. Fitting perfectly in the little space between the radiator support and relay panel, made out of square aluminium tubing, it provides a hidden and elegant solution while not taking up any engine bay space. Included in this episode: making cardboard templates, cutting aluminium, bending/shaping aluminium, loads of TIG welding, nutserts, cutting tubing, fabbing a tank, welding bungs. | ||
|
|
| Tuesday, April 01, 2014 | Part 33: Turbine Heat Shield Fab & Intake Manifold Cleaning - My 76 Mazda RX-5 Cosmo Restoration | ||
 |
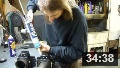
Part 33 of my '76 Mazda Cosmo restoration deals with what I would consider to be two important, though miscellaneous, tasks. While waiting for the intercooler parts to arrive I tackled what I thought would be a quick and easy job; building a turbine heat shield. I won't admit how long it took but suffice it to say that the intercooler supplies not only did arrive during the heat shield build, but were also packed away under the car and began to grow shop dust. Regardless of the time it took I must say I'm quite happy with the heat shield as I've seen very few like it. So many of the turbine heat shields on the market are nothing but a bit of bent sheet metal and a mounting bracket. At that point I decided I may as well deal with another small job so I took the time to remove excess OEM equipment from the throttle body and eliminate all the unnecessary vacuum nipples on the upper intake manifold. Included in this episode: turbo turbine heat shield fabrication, turbo assembly/disassembly, template making, stainless steel sheet metal cutting/drilling/grinding/bending, TIG welding stainless, OEM intake manifold extra nipple removal, TIG welding aluminium, FD throttle body simplification. | ||
|
|
| Sunday, May 18, 2014 | Part 34: Water To Air Intercooler Installation, Part 1 - My 76 Mazda RX-5 Cosmo Restoration | ||
 |
It's time for part 34 of my '76 Mazda RX-5 Cosmo restoration. This time, I'm installing the water to air intercooler. I've installed and fabricated plenty of air to air intercoolers in my time but never a water to air unit. I chose to use water to air on the Cosmo because it meant that I could keep the piping as short as possible for the best boost response and because of the limited amount of room to run charge piping out to the front of the car due to the large rad and A/C condenser. It was definitely a learning experience for me as I underestimated the amount of time needed to fabricate all of the components. Thus, I have split the episode into two parts. In part 1 of the installation, I fabricate a throttle inlet adapter to fit the FD throttle body, position and mount the intercooler, build charge piping, weld on a BOV flange and IAT bung, fabricate an aluminium water tank with inlet/outlet/fill bungs and mount the heat front heat exchanger. | ||
|
|
| Sunday, June 29, 2014 | Part 35: Water To Air Intercooler Installation, Part 2 - My 76 Mazda RX-5 Cosmo Restoration | ||
 |
In the last episode of my '76 Mazda Cosmo restoration, the basic components of the water to air intercooler system were laid out along with the considerable amount of fabrication needed to build the throttle body inlet, intercooler piping and water tank. As well as mount the heat exchanger and BOV. In part 35, we finish up the water to air intercooler installation by taking care of mounting the pump, plumbing all the water lines and wiring up the system. Additionally support brackets are built to support the piping. Lack of space meant I had to get creative with pump position after accidentally creating a clearance issue with the water fittings. However once mounted I was very happy with pump position and the plumbing was straightforward. Included in this episode: Cutting/grinding/drilling aluminium, making aluminium brackets, assembling AN house and fittings, wiring relay to spare Megasquirt output, adding temperature sensor to Megasquirt analog input, plumbing air to water intercooler with tank and pump, TIG welding brackets. | ||
|
|
| Thursday, August 14, 2014 | Part 36: Fuel System and Fuel Lines - My 76 Mazda RX-5 Cosmo Restoration | ||
 |
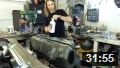
With any rotary, a robust fuel system is a critical component in reliability. This is what will be covered in part 36 of my '76 Mazda Cosmo restoration. In this episode I set up the engine bay section of the fuel system. This includes the regulator, fuel Y block, and all the fuel hoses using braided line and AN fittings. I also bend up a set of stainless fuel lines for underneath the car. The fuel tank also needed some attention so I begin the process of getting it cleaned out and ready for modification to handle an in-tank EFI pump. | ||
|
|
| Thursday, September 18, 2014 | Part 37: Carbureted Fuel Tank Conversion to In Tank EFI Pump - My 76 Mazda RX-5 Cosmo Restoration | ||
 |
Part 37 of my '76 Mazda Cosmo restoration focuses on one specific task in great detail. That task is converting the old carburetor feeding fuel tank to one which can satisfy the high pressure needs of fuel injection. The approach I take is to modify the tank to accept an in tank fuel pump via custom bracket, emulating the approach used on modern vehicles. My inspiration for the setup was the Aeromotive Phantom EFI tank conversion kit. However as the Aeromotive unit wouldn't fit in the space I had available, I chose to fabricate my own version. Additionally, I continue the task of cleaning the fuel tank as well as finish off by wiring up the fuel pump. | ||
|
|
| Wednesday, October 29, 2014 | Part 38: Fuel Tank Restoration With POR-15 Sealing Kit - My 76 Mazda RX-5 Cosmo Restoration | ||
 |
I guarantee that aside from part 38 of my '76 Cosmo Restoration, you will not find more footage on YouTube of someone shaking a fuel tank. You have my word that this is the most tank shaking coverage you will see in any video. Why so much tank agitation? Because in this episode I clean and seal the 40 year old fuel tank using the POR-15 fuel tank restoration kit. This is something which several have requested be shown so I figured as sealing was a common issue for old fuel tanks, why not dedicate an episode to the task. I begin by recycling some of the cleaning footage from the past two episodes then move right into the process of the POR-15 kit. First any remaining debris is "chained out" by using the old trick of rattling some chains around inside the tank. Then the tank is cleaned with the supplied cleaner, etched with MetalPrep and finally coated with the sealer. The end result is a tank looking better inside than the day it came the assembly line which will not be subject to future corrosion. To go with the spiffy clean interior, the outside is given a coat of POR-15 rust preventative paint as well. And did I mention this is my first episode in HD?! | ||
|
|
| Thursday, January 08, 2015 | Part 39: Front Suspension & Rack and Pinion Conversion, Part 1 - My 76 Mazda RX-5 Cosmo Restoration | ||
 |
I know it's been a while and since the front suspension work is still ongoing, I've decided to split it up into two episodes. So for part 39 of my '76 Mazda Cosmo restoration, I begin the work of updating the front suspension and converting the car from recirculating ball steering to rack and pinion. While my original goal was to mount the entire FC RX-7 front subframe, it became obvious very early that was not feasible. Instead I began combining parts of the RX-7 suspension with the Cosmo suspension to create a unique solution. Once the basics were laid out, conversion to rack and pinion steering began utilizing a NA Miata steering rack. And then I hit a silly, obvious snag... | ||
|
|
| Thursday, March 05, 2015 | Part 40: Front Suspension & Rack and Pinion Conversion, Part 2 - My 76 Mazda RX-5 Cosmo Restoration | ||
 |
In episode 40 of my '76 Mazda Cosmo restoration, the front suspension is finally finished. This time around I concentrate mainly on steering, completing the Miata rack installation I started in part 1. As I alluded to last episode, there was an easy fix to my rack dilemma; a right hand drive rack which when spun to left hand drive becomes a rear steer rack. With that hurdle out of the way I fabbed up the mounts to adapt it to the Cosmo subframe, figured out the inner tie rods, and then built the steering shaft and related machinery. Steering sorted, the next task was to mount the RX-7 struts in the Cosmo strut towers. The suspension is then completed with the reinstallation of the Cosmo stabilizer bar. This episode runs a little long but I wanted to get everything done, so pour a few drinks and enjoy. | ||
|
|
| Tuesday, May 26, 2015 | Part 40.5: A Whole New World! - My 76 Mazda Cosmo Restoration | ||
 |
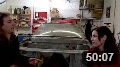
Part 40.5 of my '76 Mazda RX-5 Cosmo restoration is here! And you know what that fraction means. Yes, it means I am joined by my dear friend Rose Cora Perry for this special update episode. The changes I mentioned at the end of episode 40 are happening now, so I thought it was time to release a little update as to what's going on and when the next video can be expected. It's still going to be quite some time before the next Cosmo episode but at least now you know why. | ||
|
|
| Friday, October 30, 2015 | Part 41: LED Tail Light Conversion, Part 1 - My 76 Mazda RX-5 Cosmo Restoration | ||
 |
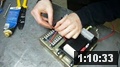
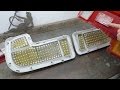
Surprise! Part 41 of my 76 Mazda Cosmo restoration is here! Part 41 is the first in a two part episode covering the conversion of the unique Cosmo tail lights from outdated incandescent light bulbs to modern LEDs. I decided to pattern my tail lights after those of the 2012 Dodge Charger, creating an outline of large LEDs, and filling the rest of the lights with small LEDs. I know it's been a while since my last episode, mainly because I've been sharing my Cosmo time with the time spent working on my new house, setting up the new shop, getting my RX-7 back on the road, oh and those little things like job, food and sleep. So I chose the tail light project because it was something I could work an hour here and there on, without requiring a fully functional shop. So here, I cover deciding on the LEDs, designing the control circuit based on an Arduino ATTINY85, and then beginning the actual LED'ding of the tail lights starting with the reverse lights. Circuit boards are designed, etched and assembled, then the new LED illumination added to the reverse lights. In the 2nd half of this episode, we'll cover the brake and turn signal lights, building the controller and integrating it all together into a spectacular assembly.
Circuit schematics, source code and PCB designs in this episode can be found at: http://www.aaroncake.net/76cosmo/taillights/ |
||
|
|
| Thursday, October 20, 2016 | Part 42: LED Tail Light Conversion, Part 2 - My 76 Mazda RX-5 Cosmo Restoration | ||
 |
It's here! Part 42 of my 76 Mazda Cosmo restoration, which finishes off the LED tail light conversion, has finally arrived. It's been a long time since the last episode, so let's make this one long and nicely detailed. As I often say, sit back with a drink and enjoy. Or perhaps several drinks if required. This episode picks up where part 41 left off beginning with mounting up the turn signal boards. Here I cover designing and building the rest of the circuit boards for the brake lights, building and programming the Arduino ATTINY85 powered controllers, modifying the tail light housings and lenses to accept the LEDs then putting it all together for a spectacular demonstration of the completed lights.
Circuit schematics, source code and PCB designs in this episode can be found at: |
||
|
|
| Sunday, May 07, 2017 | Part 42.5: Meth Is A Hell Of A Drug - My 76 Mazda RX-5 Cosmo Restoration | ||
 |
I didn't think I'd ever have to release an episode like this. But unfortunately we live in a world where someone like me, who just wants to live their life and work on their passions, falls victim to another undesirable segment of society with no goals past finding the way to their next fix. Then it's up to me to put life on hold, spend my time, energy and money to pick up the pieces. Set backs are part of building a car in the real world, without a TV crew to show up after hours. I just didn't expect nor need this kind of setback. | ||
|
|
| Thursday, October 05, 2017 | Part 43: Tucking, Shaving & Smoothing (The Front Bumper) Part 1 - My 76 Mazda RX-5 Cosmo Restoration | ||
 |
In part 43 of my '76 Mazda RX-5 Cosmo restoration, I begin the process of doing something about those horrible '70s "safety" bumpers. It was a dark age from 1973 to 1982 when the US federal government mandated that bumpers must sustain a 5MPH collision without damage. The result being atrocious protrusions at the front and back of a vehicle sticking out 6" on pneumatic shock absorbers. While most of the rest of the world got sleek, stylish bumpers which actually enhanced the body lines. The solution of course is the old hot rodders trick of tucking, shaving and smoothing the bumpers to better flow with the rest of the car. So unlike last time with all that delicate electronic work, this time it's all cutting, welding and pounding metal. | ||
|
|
| Monday, January 01, 2018 | Part 44: Tucking, Shaving & Smoothing (The Front Bumper) Part 2 - My 76 Mazda RX-5 Cosmo Restoration | ||
 |
A new year, a new bumper for my '76 Mazda Cosmo. So in part 44, I finish off the bumper modifications started in part 43. The smoothening continues with flush mounting the light lenses, then moves on to addressing the gaps between the bumper and body. Finally, a duct is added for the oil cooler which will eventually integrate with the front valence. So get ready for a bunch more metal work, a flurry of welding, and a metric crap ton of grinding. | ||
|
|
| Wednesday, July 11, 2018 | Part 45: '07 BMW 328i (E90) Seats Installation - My 76 Mazda RX-5 Cosmo Restoration | ||
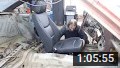 |
As I alluded to in episode 44, part 45 of my '76 Mazda Cosmo restoration deals with retrofitting in a pair of new seats. My ass chose those out of a 2007 BMW 328i, which I then came to know as an "E90". I was looking for a set of modern seats will all the power features and not only did my butt confirm that these were mighty comfy seats, but the measuring tape confirmed they would fit well in the Cosmo. Because there's little worse in a custom car than a set of seats that look completely out of place. Turned out that while the seats fit well into the car, actually mounting them took somewhat more effort than I expected. | ||
|
|
| Sunday, December 23, 2018 | Part 46: RFID Door Locks/Openers - My 76 Mazda RX-5 Cosmo Restoration | ||
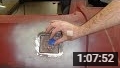 |
First things first: I'm going to freely admit that this project is not critical to getting the car finished. Honestly it has just been an idea that seems to have implanted itself in my head a few years ago and rattling around inside me since then. So I decided to inject a little fun and magic into the previously shaved doors (remember part 8?) with the addition of RFID actuated openers. And yes, I realize this episode is fairly long and perhaps should have been lacerated into two parts, but I think you'll understand why I didn't split it up by the end and chose to keep it homogeneous. It also turned out to be very involved, in the sense that part 46 includes almost every fabrication technique I have access to: welding, rapid prototyping (3D printing to the lay person), fiberglass, electronics, programming and anatomy. Oh, there might also be a visit from a certain special guest to help out. One other fascinating fact is that I used more disposable latex surgical gloves in this episode than all previous episodes combined! Electronics schematics, PCB patterns and Arduino code at: https://www.aaroncake.net/76cosmo/rfid_doors | ||
|
|
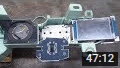
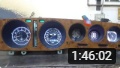
| Thursday, July 18, 2019 | Part 47: Electronic Instrument Cluster Conversion | ||
 |
The viewers have voted! At the end of part 46 I presented a choice as to what you would like to see next and by a wide margin, we have a winner. Episode 47 of my '76 Mazda Cosmo restoration focuses on converting the instrument cluster from 40 year old analog mechanical gauges to electronic gauges. Not some gaudy named-after-a-US-state Digital glowing green digital panel slapped into a classic looking frame of course. Instead, a true integration of the existing gauges with modern electronics and control, taking information from an MS3-Pro fed CAN bus. Suffice it to say, there is a lot of delicate detail here, working with ridiculously tiny screws, machining of small parts and some electronics as well. There will also definitely be a part 2 of this episode, and possibly a part 3, because building an OEM integration level instrument cluster is no small task!
Schematics, code and board patterns from this video: https://www.aaroncake.net/76cosmo/cluster |
||
|
|
| Thursday, October 24, 2019 | Part 48: Electronic Instrument Cluster Conversion - Part 2 - My 76 Mazda RX-5 Cosmo Restoration | ||
 |
Well it's that time again. Yes, time for another installment of my '76 Mazda Cosmo restoration. In part 48, I continue the process of converting the old mechanical instrument cluster to a well integrated modern unit while retaining most of the appearance of that crazy time we call the late 1970s. TFT screens replace rolling odometers, stepper motors replace gauge movements and useless faux gauges which were nothing more than warning lights get turned into something more useful. Lots of tiny milling, lots of tiny hardware and some delicate welding. This finishes up the mechanical work on the cluster. As I predicted, there is going to be a third installment in which I design all the electronics to make the thing work. Schematics, code and board patterns from this video: https://www.aaroncake.net/76cosmo/cluster | ||
|
|
| Wednesday, December 30, 2020 | Part 49 - Electronic Instrument Cluster Conversion - Part 3 - My 76 Mazda RX 5 Cosmo Restoration | ||
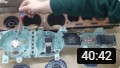 |
It's been a long while, hasn't it? Who would have thought that retrofitting a 44 year old instrument cluster with modern electronics and building almost everything from scratch would be complicated? Yep, that's right. It's part 49 of my '76 Mazda Cosmo Restoration! And once again, I am continuing to work on the instrument cluster. This time I'm getting the final touches done by building the backlight boards, making the boards for the fuel and temp gauges, making some mistakes, and finishing up with all the cluster innards. It's another electronics episode mostly, which I know isn't my usual fare, however "electronics" is a big part of an electronic instrument cluster. And man, I'd have to say this is the most complicated single project I've done on this car so expect at least another episode to finish up the cluster. | ||
|
|
| Tuesday, April 20, 2021 | Part 50: Electronic Instrument Cluster Conversion - Part 4 | ||
 |
Episode 50 of my '76 Mazda Cosmo Restoration is packed full of detail and information. Possibly more than any other episode released. Because after all, there's a lot to say about designing and building an Atmel 1284 powered CANbus communicating, stepper motor driving, TFT screen displaying, addressable LED controlling, rotary encoder twiddle accepting, heart of an electronic instrument cluster, circuit. That's what this episode primarily concentrates on with a bit more thrown in the middle. It's heavy on the electronics of course, and the last installment before final assembly of the instrument cluster. You might want to pour yourself a drink, sit back, brace yourself (that's what she said). By the way, I made an obvious mistake in this video. Can you spot it? Schematics, code and board patterns from this video: https://www.aaroncake.net/76c osmo/cluster | ||
|
|
| Tuesday, September 14, 2021 | Part 51: Electronic Instrument Cluster Conversion - Part 5 - My 76 Mazda RX-5 Cosmo Restoration | ||
 |
Episode 51 of my '76 Mazda Cosmo restoration is here! First, let's talk length.
That's what she said. I know it's ridiculously long. The title of my sex tape. Thing is,
this video contains the entirety of final assembly of the electronic instrument cluster
and it was an ordeal. Stuff broke, mistakes were made, more stuff broke, and add
a long wait for replacement parts.And then I had the joy of reliving it all while
editing this monstrosity. I could have split it into two, but then that would extend the
instrument cluster to 6 parts and I just wouldn't have it. So dear viewer, I implore
you to have the same experience watching it as I had making it. But here's the
thing: it worked out rather well and even though I have months of programming to
make this cluster actually do anything more than twiddle the needles, I think it was
worth it.
Schematics, code and board patterns from this video: https://www.aaroncake.net/76c osmo/cluster |
||
|
|
| Friday, April 01, 2022 | Part 52: Again With The Intercooler?! - Part 1 | ||
 |
In any long running project, and no one will debate that this is a long running project, there are always things that one looks back on and reconsiders. And for years, there has been a big one in the engine bay: the intercooler. I was never happy with the angular placement and the almost improvised look of the plumbing. It seemed as though it was an after market kit made to fit a space. It was at odds with the engine bay. It ate at me. And after the instrument cluster I wanted to cut and weld! So I made the decision to seemingly go backwards and redo work already done. It was absolutely the correct decision. | ||
|
|
| Tuesday, July 12, 2022 | Part 53: Again With The Intercooler?! - Part 2 - My 76 Mazda RX-5 Cosmo Restoration | ||
 |
In part 53 of my '76 Mazda Cosmo restoration, I finish the rework of the water to air intercooler I started in episode 52. With the ideal position established, all the tubing needed to be changed to match. And if I was doing that, well, I figured I may as well ditch the pedestrian silicone couplers and clamps for something much more awesome. This is another episode filled with cutting, grinding and TIG welding. The final product is exactly how it should have been from the start! | ||
|
|
| Thursday, January 05, 2023 | Part 54: Better HVAC Bracket and Improved Balls - My 76 Mazda RX-5 Cosmo Restoration | ||
 |
Time to tackle two more aspects of my previous work I am unhappy with. In part 54, I'm re-fabricating the bracket used to adapt the Vintage Air Compac Gen 2 HVAC unit (parts 29-31) and fixing an issue with the front camber I created when I used Mazda 626 ball joints to allow use of FC RX-7 spindles (parts 39 - 40). Years of looking at my poorly designed HVAC brackets weighed heavy on my conscience and I knew I could do better. So too with the front suspension; I had come to the conclusion that there wasn't enough adjustability to allow proper alignment. This episode, I correct both these mistakes to end up with results I find truly satisfying. | ||
|
|
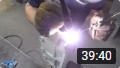
| Friday, October 27, 2023 | Part 55: Air Suspension 1 - Rear Bags - My 76 Mazda RX-5 Cosmo Restoration | ||
 |
Episode 55 begins the project I've wanted to do since even before I bought the Cosmo: air suspension! In this video I modify the rear trailing arm to accept the air springs, create mounts to allow access to the bolts and fittings, then modify the frame rails with new spring perches. Lots of metal work and fabrication to get the rear end bagged. Enjoy! | ||
|
|
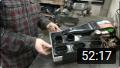
| Wednesday, July 10, 2024 | Part 56: Air Suspension 2 - Front Air Struts and Brackets | ||
 |
At long last, episode 56 of my '76 Mazda Cosmo Restoration is here! In this episode, I experience a rare phenomenon; a part that almost bolts on! Very few modifications are needed to fit the Air Dynamiks air struts, meant for a 2nd gen RX-7, into the Cosmo shock towers. Though I freely admit the way I went about those modifications was a little weird. Next up, I start on the brackets to mount all the support hardware in the trunk. Because an air suspension needs a compressor, tank and solenoids, right? On a personal note, I know it has been a while. In January I ended up sick with COVID-19. It took me out for nearly a month and 6 months later, I am still constantly tired. So work on the Cosmo has been slow. | ||
|
|
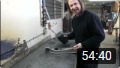
| Saturday, October 05, 2024 | Part 57: Air Suspension 3 - Compressor, Solenoids and Tank Brackets | ||
 |
Episode 57 of my '76 Mazda Cosmo Restoration picks up exactly where episode 56 ended: fabricating the brackets to mount all the air suspension support components. Here I complete fabrication of the tank, solenoid and compressor brackets. The idea was to create a compact and almost modular installation tucked into the inside of the rear quarter and I am happy with the result. | ||
|
|
Back To Home Page | Mail Me | Search | ![]()