| Home > My Projects > Aluminum TIG Welding Cart |
Date Of Project: Fall 2008
After purchasing my Miller Econotig I was eager to actually use it on a project. Traditionally, the first project a welder is to be used on is to make a welding cart. However, my first small project with this welder was an aluminum rear strut bar for my RX-7. With only two simple welds it didn't really offer much in the way of practice and after not welding aluminum in several years, it was clear that I needed it. As I was tired of hauling around the 170 LBs welder by hand, the next project was logically a welding cart. And to get the practice I needed, the cart would be made of aluminum and include as many different welds as possible.
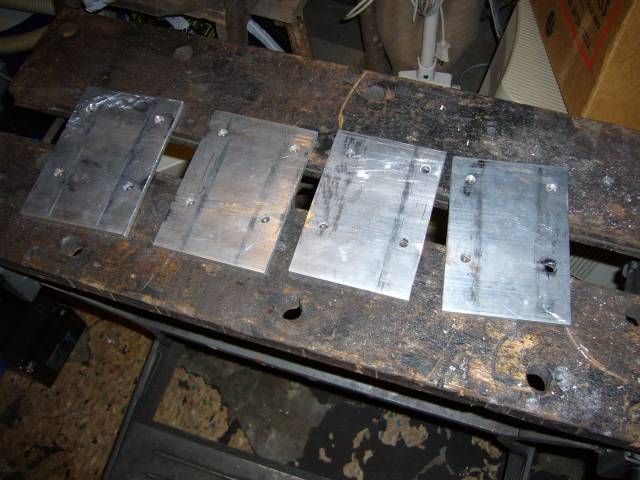
The first step was to cut a few flanges for the casters. I chose 1/4" 6061 which is right at the limit of what one can expect the Econotig to weld using GTAW (thicker welds on aluminum can probably be made with this machine using SMAW, though I have not tried). I cut out the flanges using my jigsaw and then drilled 4 holes to mount the casters.
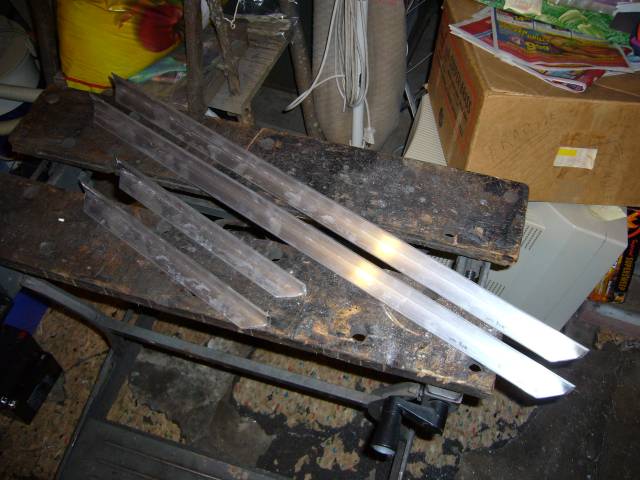
Next up I cut the 1" x 1" 6061 aluminum angle to form the base. The ends were cut with 45 degree angles using the jigsaw and then finished with the file for a clean fit up. Of course, good fit is a key to nice TIG welds but I was actually a bit happy to find out that I had to adjust things slightly upon tacking to keep the assembly square as it would give me more practice in gap filling.
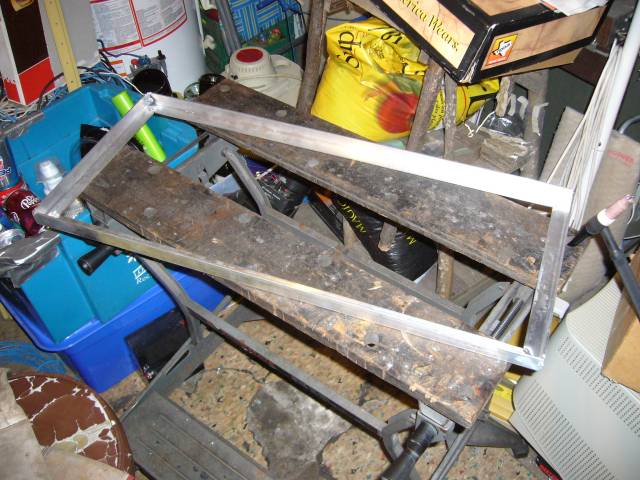
I took some time to carefully square up and tack the frame. I tacked up the pieces first in to L shapes with one 90 degree joint, made sure they were square and dimensionally accurate, then tacked them into a box on top of a large aluminum sheet. The sheet was used to provide a flat surface as the work bench is a little bit warped after all these years. As you can see, space is at a premium which makes fine welding like TIG an exercise in frustration. Look over at the top left corner to see where I dipped the Tungsten in the worst possible spot. Cleaning that up for final welding was a pain.
The cart needs to hold both the welder and bottle (as well as accessories) so it needed a rear section on which the small bottle can sit. To accomplish this I notched out another section of 1" angle to sit flush inside the frame. A flat piece of aluminum keeps the bottom level with the existing frame while it's tacked into place.

The caster mounting flanges were next. But first, notice the change in scenery? I was partly creating this cart because a friend I leased a shop which we can use to work on our own projects. Out of my cramped garage and basement, it is far nicer working in an area with space for 3 cars, and a work area with two benches and plenty of room to move around in. Things are much less frustrating when you're not perched on a stool above a Black and Decker Workmate table with barely enough room to move.
To keep the frame square I decided to mount the flanges and take care of the welding on the inner joints. This locked the frame together in a ridged assembly which meant no more worrying about knocking the tacks out of square.
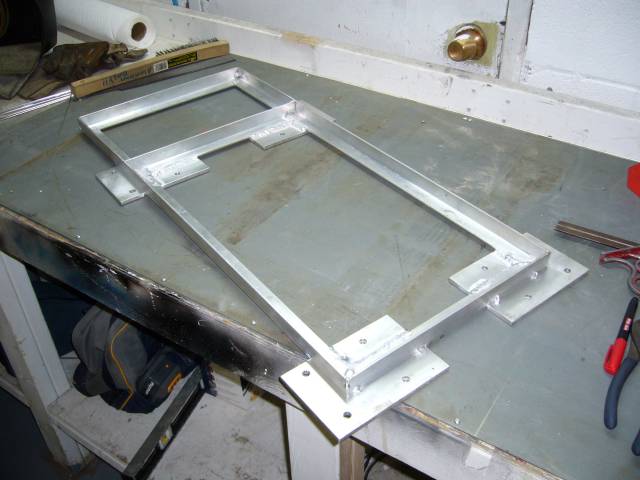
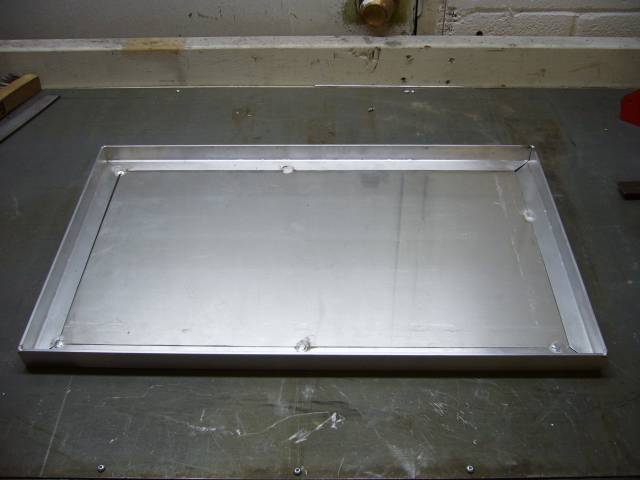
The cart needs a top tray to hold tools and accessories so I simply copied the measurements on the bottom frame and tacked it together. A floor made of 1/8" 6061 aluminum was cut out using the jigsaw and then placed inside to mount up flush with the aluminum angles. Lots of butt-weld practice here! I knew that running full beads along each side without stopping would cause some warpage, but I cared more about practicing manipulating the filler rod for a continuous weld then keeping the top tray perfectly straight. As it turns out I forgot to take a picture of the finished welds but you will see them later on.
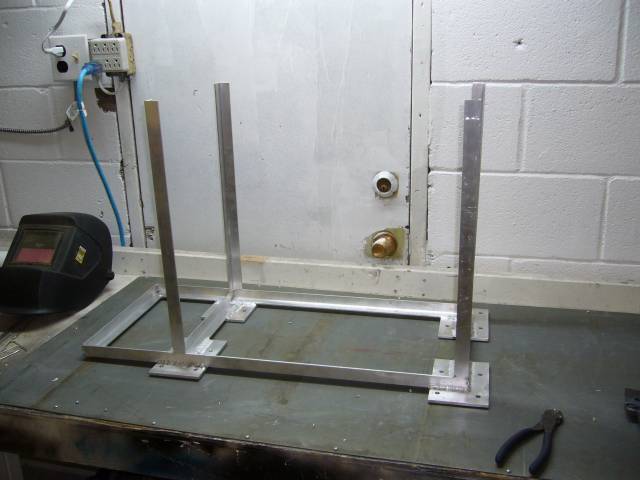
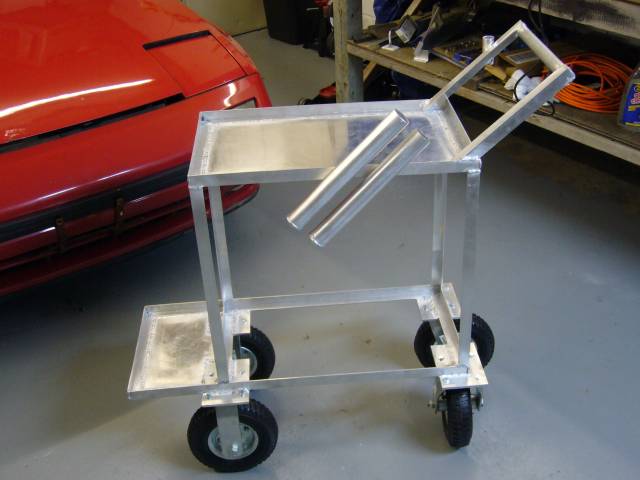
As the tray sits above the welder, I cut 4 sections of 1" aluminum angle to 19", then tacked lightly at each outside corner. I then squared one piece so that it was at perfect 90 degree angles to the base, and put down a few large tacks to hold it in place. In this way, one upright is a true starting point for alignment which makes it easier to get the remaining three as square as possible. 19" was chosen as it allowed just enough room for the welder to be slipped into the cart, but not so much room that junk would be encouraged to accumulate on top of the welder itself.
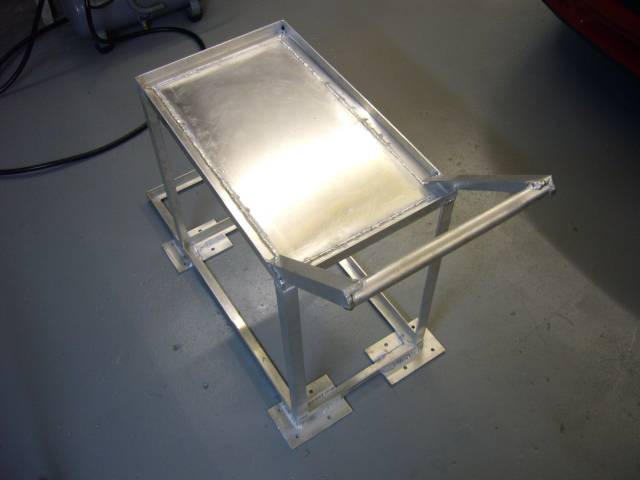
The tray was placed on top of the uprights and then tacked. I first tacked heavily to the squared upright and then worked my way around the assembly with a carpenters square to line everything up. Then a long level was used to make sure that the tray was basically even with the base side to side. Otherwise the tray might not have lined up visually when looking down upon it. Honestly, strict dimensions were not exactly critical but things had to be close enough so that the eye would see nothing wrong. I very much doubt that the NASA inspectors will be examining my welding cart with a micrometer. Still, it pays to keep it as straight as possible without going overboard. Once I was satisfied with the fit, I finished off the welds.

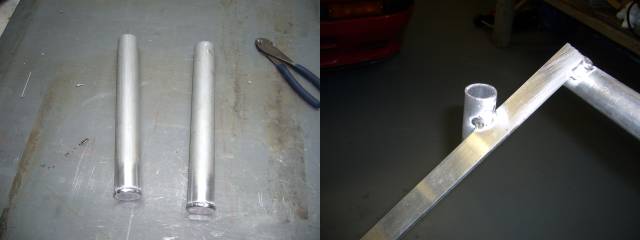
Every cart needs a handle to be useful. This handle was made using a bit of 1" aluminum thin walled tubing and two pieces of 1" angle. I simply cut the bottoms at about a 45 degree angle, then tacked the assembly together on the bench. It was a bit of pain to keep it square while putting it all together on the bench. One thing you really miss when working with aluminum as opposed to steel is the ability to use welding magnets to keep things in place. The handle slipped into place without much of a fuss and was then completely welded. By now I had really gotten the hang of the torch so welding this thing out of position was no sweat. After a little bit of use, a few sharp edges were found on the handle and then promptly filed down after the first couple maimings.
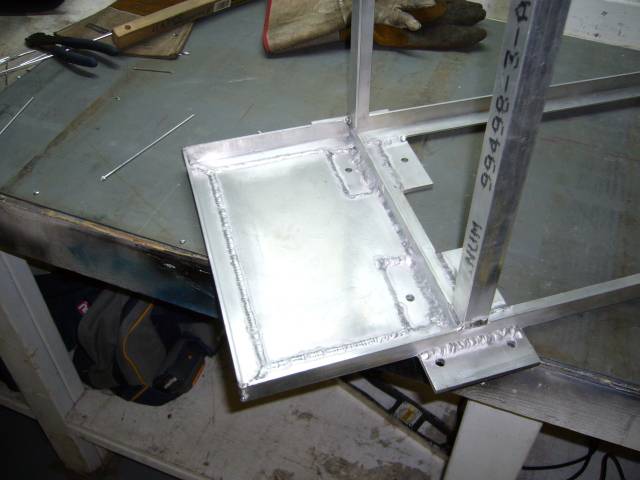
Without somewhere to mount the gas cylinder, this cart would be pretty useless. There's no point in having a welder that you can move around if you are still tethered to a cylinder off in the corner. So in order to mount the bottle, I added a floor to the rear of the cart using 1/8" aluminum. I traced out the pattern and then cut it with the jigsaw to sit flush with the existing floor formed by the angles. However, this meant that it sat about 1/8" off of the caster mounting flanges. This worked out well as it was a great practice in gap filling. Why everyone says gap filling is difficult with TIG, I don't know. Personally I've always found it very easy as it's far easier to control the heat with a foot pedal then it is with a weave pattern (as you would with MIG or stick).
My welds on the outer area of the flanges are a bit messy, I know. As it turns out, the breaker on the welding circuit was very sensitive so it would trip if too much current was requested. Because of this I couldn't get enough heat in the joint to lay down a decent bead. The breaker has since been replaced so I can now run the welder at full throttle without worry.
Some bits of 2" aluminum tube became filler rod holders once bottoms were added, and a piece of 1" tube welded to the side of the handle makes a great torch holder. Two tubes were used to house filler rods for the two primary materials which will be welded by this machine: aluminum and stainless steel. I welded the filler rod tubes on the low AC range and was surprised at how much control over the heat is possible. Unlike the larger units I have used in the past that always started too hot, the Econotig was easy to control down low.
It was now time to install the wheels. First though, the filler rod tubes were welded in place. You'll notice they are rather short compared to most. Years ago I got into the habit of cutting my filler rods in half for easier handling so I sized the tubes appropriately. There's plenty of room on the cart for some full sized rod holders should that become necessary.
The wheels are large pneumatic casters that I purchased on sale from Princess Auto. In the past I have been nothing but frustrated with the typical small solid casters used on toolboxes and shop carts so I picked something that will roll over a bolt or cord without getting hung up. The rear wheels are fixed while the fronts swivel for steering.
And now, the moment of truth! It was finally time for the welder to be installed. Unfortunately, there was one small snag...It didn't fit! I had built the cart to hold the welder very snugly and from the beginning knew that I would have to notch the back of the uprights to slip it in. As it turns out, after I was done "notching", there was virtually nothing left of them and the rear of the tool tray waggled around as if it was mounted on springs. To rectify the situation I picked up some 1" aluminum square tubing and mounted it on the outside of both the top and bottom frames. That gave me just enough clearance to slip the welder inside so it rested on the flange formed by the lower frame.
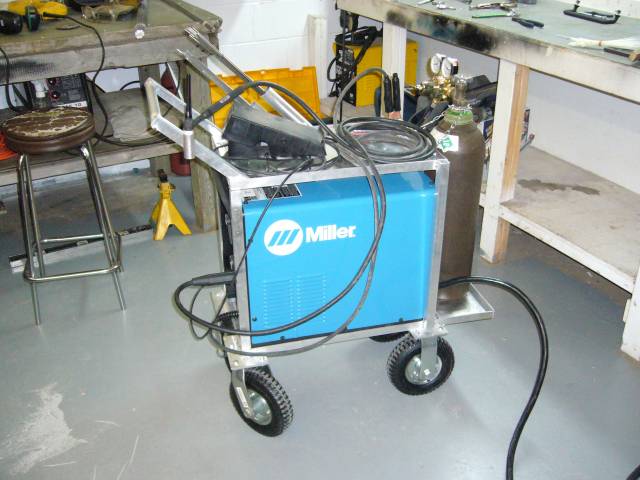
The gas cylinder fit perfectly out back and was secured with a small chain wrapped around the valve and bolted to the top tray. A few zip ties secured the coiled gas hose to the side to keep it out of harms way.
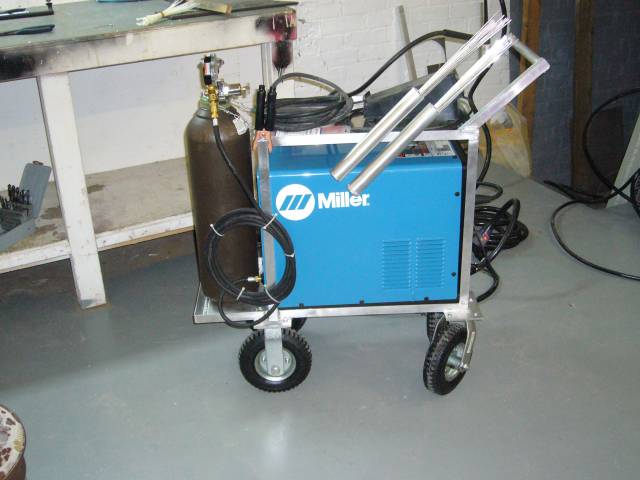
I'm quite happy with how the cart turned out. It rolls easily, is very stable and feels sturdy when you lean against it. I'm pretty sure I could have purchased one for half of what this thing cost me in materials and Argon, but what's the fun in that? The practice behind the torch was very valuable and has set me up for more critical projects in the future. Overall I'm also very happy with the Miller Econotig. It's a very capable machine for hobbyist type work and I'd happily recommend it to anyone looking for a decent entry level TIG setup.