| Home > RX-7 > Tech/Mods > Mods > Megasquirt > Mount The Megasquirt ECU |
It is finally time to actually start putting Megasquirt stuff into the car. In order to have somewhere to actually route the harness to, you need to first install the ECU. These instructions cover modifying the stock ECU bracket to hold the Megasquirt and related components. This approach puts the 'Squirt in the same location of the stock ECU and requires a slight bit of metal fabrication (and a welder, if you have access). You don't have to mount the Megasquirt as this writeup suggests but we are going to proceed assuming you do. Another popular location is inside or just behind the glove box. This provides more convenient access to the 'Squirt but if you choose the inside of the glove box, you lose some storage space. If you are planning on experimenting with the 'Squirt then the glove box might be the way to go.
MS3-Pro is a much different case than the other Megasquirts so it will not fit very well in place of the stock ECU. As the connectors are mounted on the top of the unit, there isn't enough vertical space between the ECU bracket and ECU cover to allow it to fit. You have a few choices in this case. You can make the ECU bracket large enough to accept the MS3-Pro and then modify the cover with the slight sacrifice of some foot room for the passenger. Another option is to modify the OEM ECU bracket for the fuses and relays, then install the MS3-Pro up under the dash (rear of the glove box) or on one of the passenger kick panels. Finally, you can just toss the whole mess into the glove box, being careful of course to make a neat and sanitary installation.
Remove the stock ECU from the stock bracket and set the ECU aside as you no longer need it. Measure the distance between the top and bottom of the bracket and note that measurement. Using a cutoff wheel, hack saw or other appropriate tool, cut the bracket out from the center of the two flanges and get rid of it. You should now be left with the top and bottom of the ECU bracket but nothing in between.
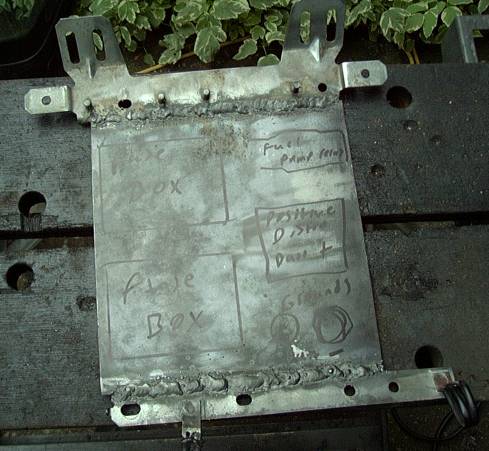
If you have a welder, cut a piece of sheet metal (about 2MM thick) with a length appropriate to fit between the two halves of the ECU bracket and a width approximately equal to that of the bracket. Mount the top and bottom ECU brackets in the car and tack in your metal. Remove it from the car and lay down some welds to secure it. You should end up with an assembly somewhat like the image below:
Don't mind the markings on the picture as they were just there to indicate a possible layout that was ultimately not used.
Now, if you don't have a welder and don't know anyone who is so equipped, you will need to cut your metal just a bit longer so that you can bolt it to the bracket halves. This will require some slight bending so you may want to choose aluminum as it is easier to work by hand. From the picture above you can see that there are some studs on the top bracket you can use to secure your panel with nuts, but a nut and bolt will be required on the bottom.
To keep corrosion down and provide a more uniform look, paint the bracket with the colour of your choice. I prefer aluminum coloured rust paint. Cheap, easy to use and dries fast.
The Megasquirt should be located near the top of the bracket so that the stock ECU cover still fits, which leaves the bottom area for the relays and fuse box. Using the picture below as a guide, drill mounting holes for the Megasquirt, relays and fuse box. Then mount them up using the appropriate hardware.
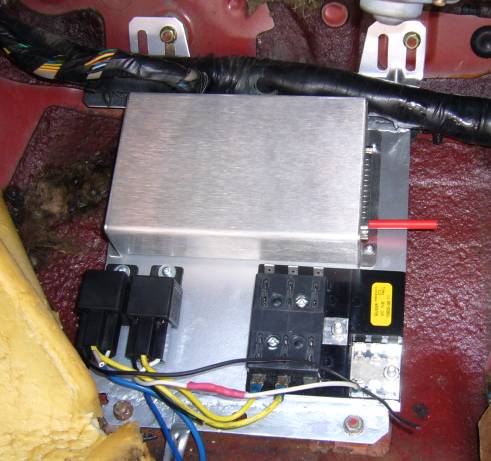
I suggest using blue Loctite on the hardware to prevent it from vibrating loose in the future. Since the relay cases and fuse box are plastic you can't torque them down as much as you can with the fasteners that secure the Megasquirt. The Loctite will keep them snug regardless.
Remount the assembly into the car in place of the stock ECU. This is where a good portion of the wiring will take place during the rest of the install. Now that we've laid the ground work we can get to the fun stuff. Onward and upward into the engine bay...