| Home > RX-7 > My RX-7 > Project Tina > Project Tina, May 26, 2005: Oil Pan, Porting Turbo Wastegate, Rust Repair, Misc. Wiring |
| Home > RX-7 > My RX-7 > Project Tina > Project Tina, May 26, 2005: Oil Pan, Porting Turbo Wastegate, Rust Repair, Misc. Wiring |
It's time once again for another update on my ongoing turbo-NA-bridgeport project. Progress over the last few months has seemed slow due to not having large amounts of continuous time to work on things. But in reality, actually a lot has been accomplished. Many of these tasks are small, but in a project such as this, the meat of what needs to be done are small side jobs in between the large chunks. Thus, these pictures probably aren't anything ground breaking or as interesting as an engine assembly. Most of them deal with things outside the engine bay. While these aren't as glamorous as porting or engine assembly, they are necessary parts of the groundwork that supports the larger part of what is taking place.
That said, I don't think anyone will find this post boring. As always, there are a few neat details that you won't see anywhere else. All of this has brought me to what will take place very soon (not in this thread): after almost three years, the engine will be reinstalled in the car.
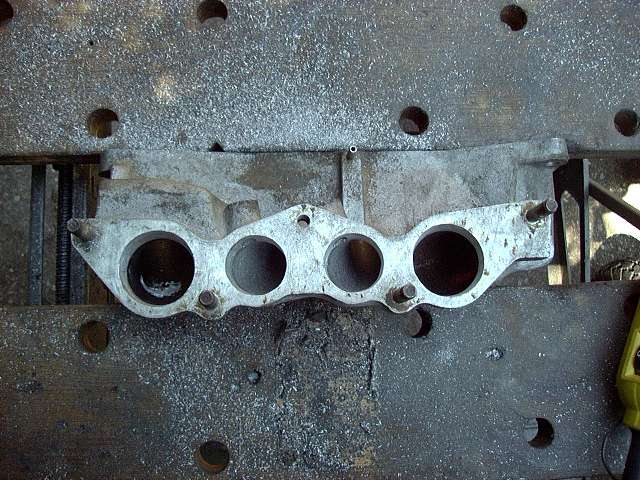
So, to pick up where we last left off, here's the lower intake after some quick porting. Since it was already being heavily modified, I figured that I might as well port it. The gains are very small, and it's absolutely not worth doing unless you already have the intake removed and are very bored.
With the engine moved out of the basement and into the garage, it was time to install the oil pan. First, the oil pressure regulator was installed, and then the pickup. This oil regulator has been modified by shimming. Two M5 flat washers were placed inside the bottom of the piston. This increases spring tension, and thus oil pressure. Two washers should make for about 100 PSI of pressure.
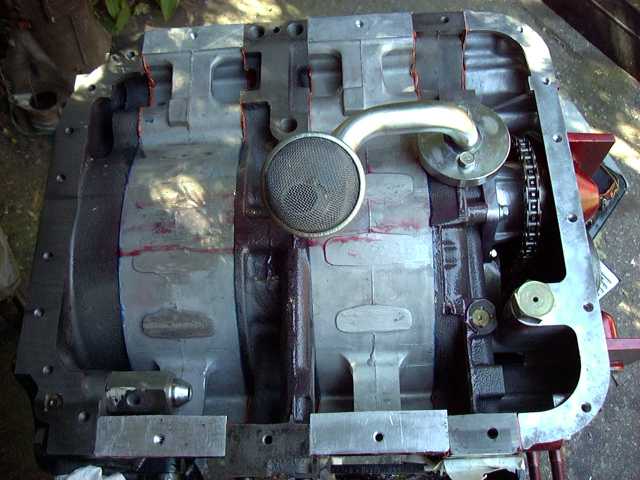
Next, the gasket and sealant were installed. On top of that, a Racing Beat baffle plate was installed. This plate prevents the oil from sloshing away from the pickup during deep, high speed turns. A must for anyone intending to autocross or track the car.

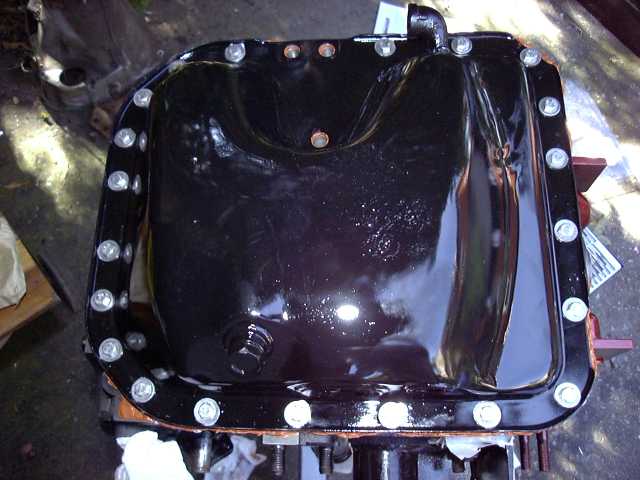
And then the oil pan is installed, with another gasket between it and the baffle. Notice the stainless steel bolts, as well as the wide washers. The washers help spread out the force from the bolt heads, thus going a long way to preventing oil leaks. I had to manually cut each of these bolts to size. Anytime stainless hardware is used, anti-seize MUST be applied to the threads. Otherwise, the stainless will weld itself to the aluminum of the engine.
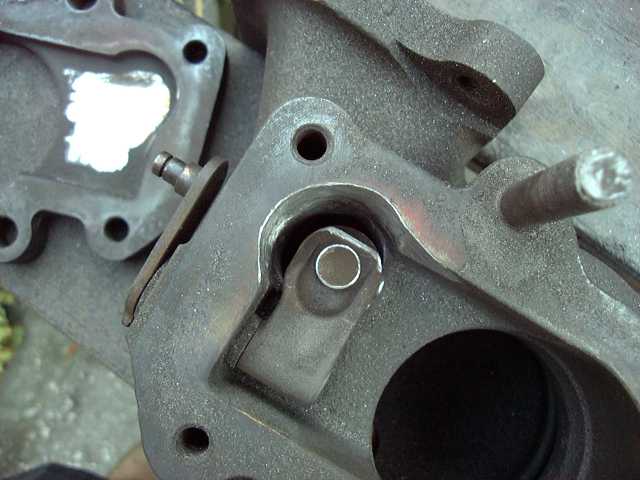
With the oil pan installed, it was time to do a little porting on the turbo wastegate.

You can see how the wastegate orifice is becoming much larger then the flapper door itself. This is the ONLY way to effectively port the wastegate. Also, relief has been cut into the backing plate to allow the wastegate to swing open much wider.
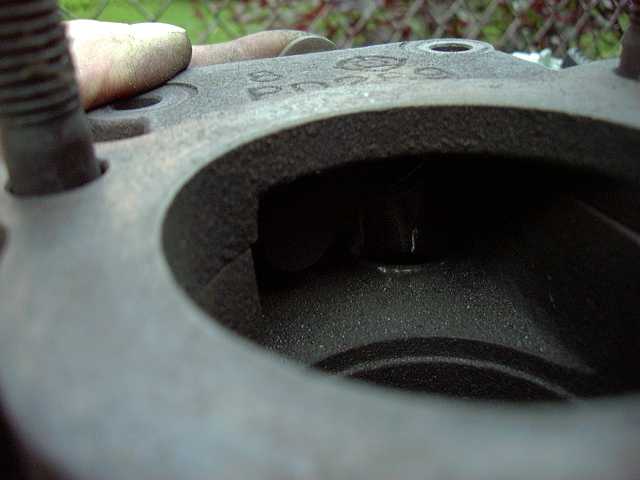
A very dark interior view of that wastegate.
Since the turbo is disassembled, might as well port those exhaust runners. Here, you see the smaller twin-scroll runner is now ported as large as the "main" runner.

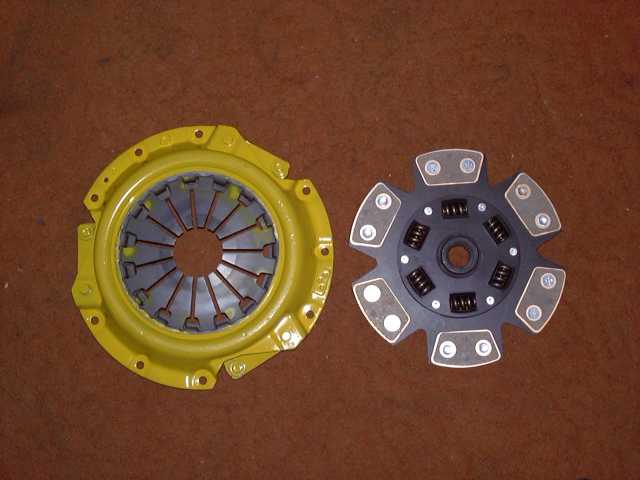
My clutch came about this time. Purchased from CP Racing. It's a nice looking clutch. Also, much stronger then stock.
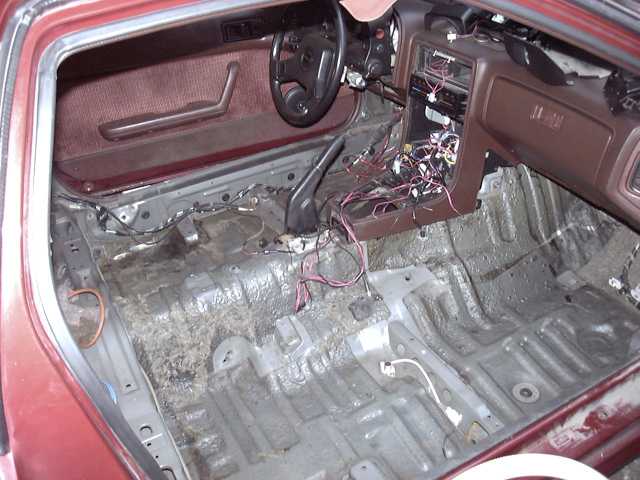
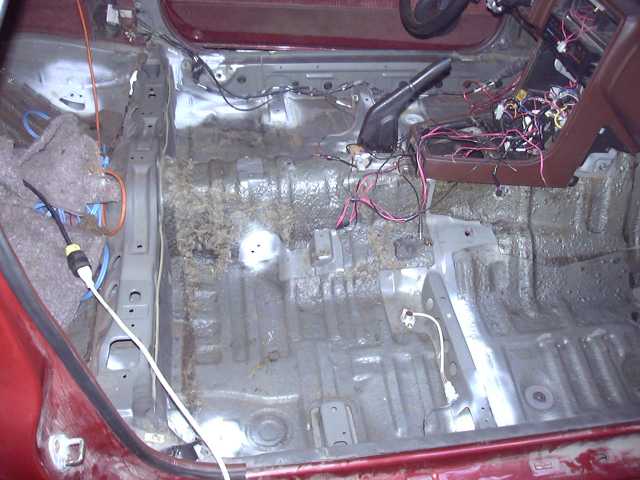
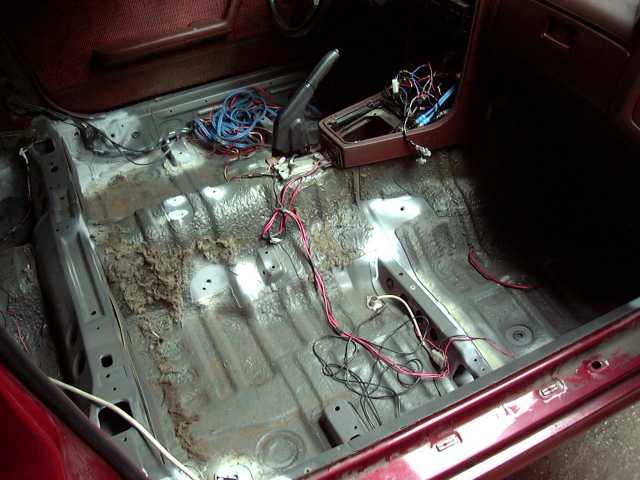
For a change, it's time to work inside the car. The carpets are being replaced, the door panels recovered, and the seats recovered. First step was to remove the carpet, seats and console.
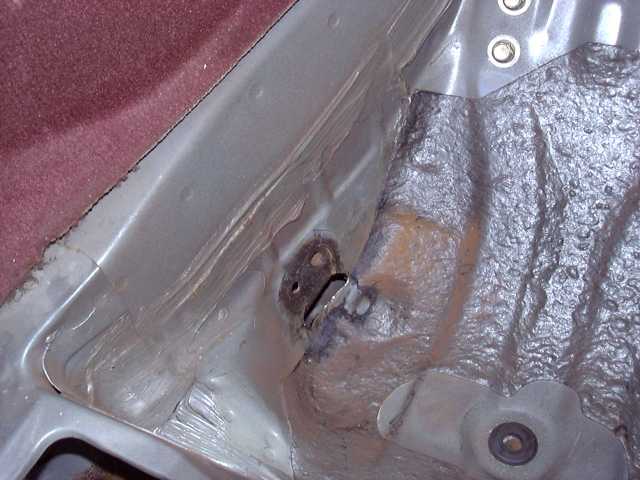
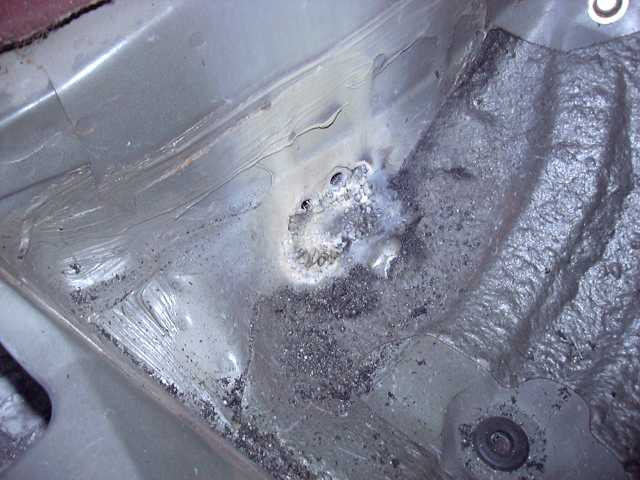
While pulling apart the storage bin areas, I made a horrible discovery: cancer! This was found on the drivers side.
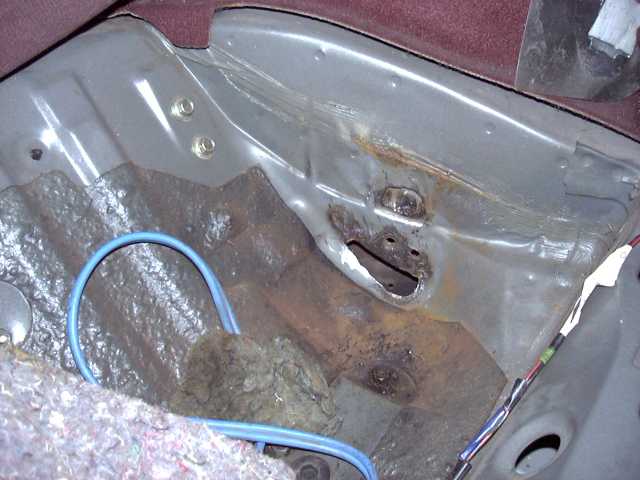
More on the passenger side. Clearly, the bolt holes for the rear seats have allowed moisture to get trapped between the frame rail and body in an unprotected area. So it rotted through.
A few other minor areas of concern were found. Any surface rust was ground off then primed to prevent further corrosion.
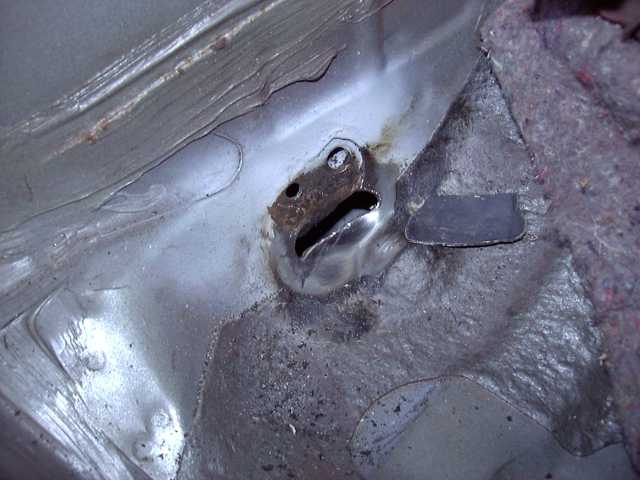
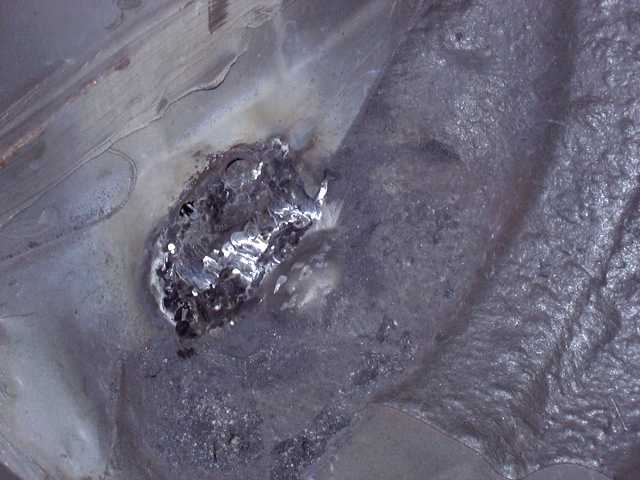
The only way to fight cancer is to cut it out. Rotted metal must be cut away to expose good metal, then a patch panel made and welded in. Below shows the large hole left after cutting the cancerous skin away, and the new panel of virgin steel.
The new panel is welded in. Welding thin sheet metal takes patience, and a thin wire. Unfortunately, I only had 0.035" wire on hand, so there was some frustration involved.

The welds are ground down. Truthfully, this area didn't have to be perfect, since it is going to be covered by a battery box. But it does have to be presentable.
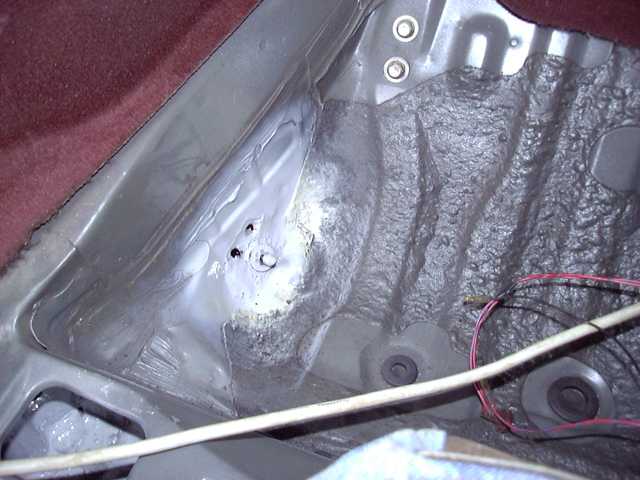
A similar panel was made for the driver side. The patch was actually quite a lot larger in that area. More care was taken on this side, since in theory, someone at some point might see it. But it doesn't need the effort necessary when working on a visible exterior panel. The black mark you see is actually the undercoating that made it's way through the bolt hole and oozed over the primer.
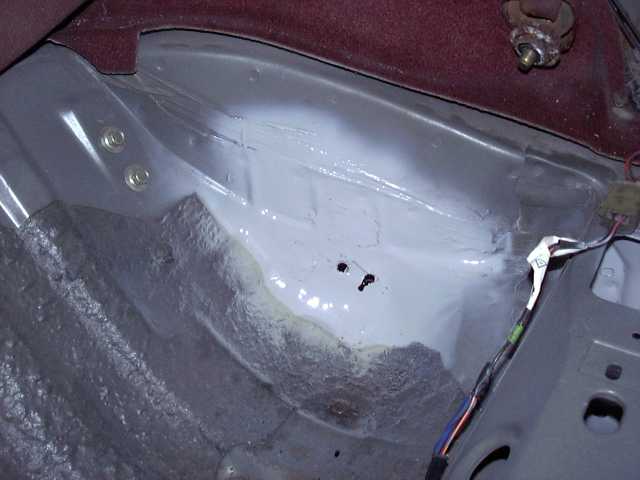
The passenger side patch is finished. A bolt was welded to the panel to provide a good ground for the battery. But this bolt is actually going to be removed since it's in the way of the battery box.
After the cancer treatments, the remaining interior touch ups were made and some of the wiring is being laid in place.
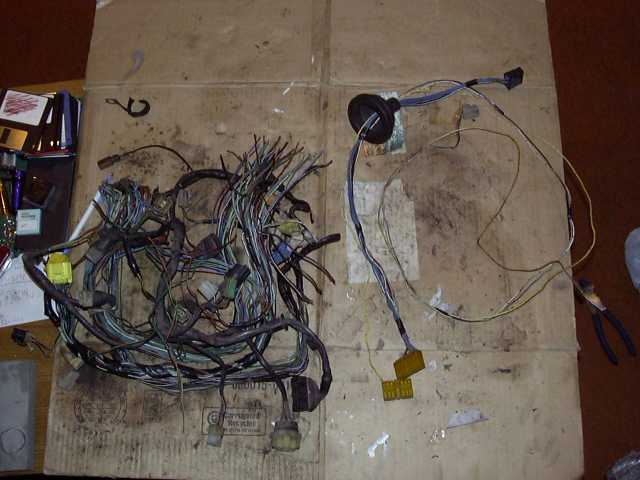
Since I am ditching the stock ECU in favor of the Microtech LT-8, most of the engine wiring harness is no longer needed. The only thing necessary to keep are the leads to the wiper motor, alternator and coolant sensor. On the right is what's left of the stock wiring harness. On the left is all the unneeded stuff. I was amazed at the condition my stock wiring harness was in. Underneath the crusty exterior, the inner wires looked as if they had just come from the factory. Goes to show you that the Mazda wiring, while somewhat unique, is high quality stuff.
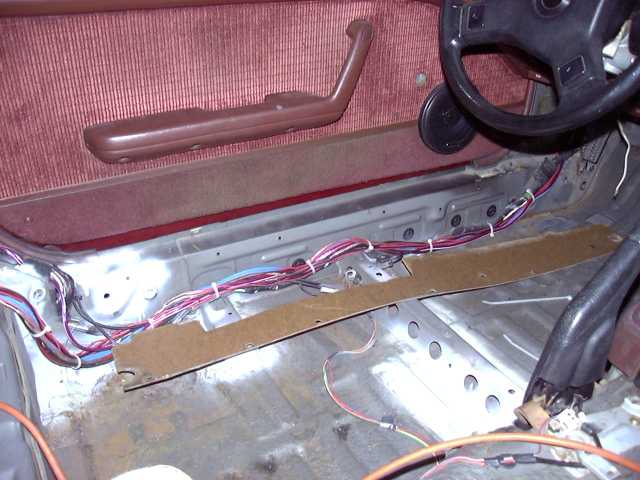
Wires were then run down the driver side sill for the audio and MP3 player. In this bundle, power for both the amp and MP3 player, speaker wires from the amp, signal wires to the amp, and audio to/from the MP3 player. Also a few other misc signal wires. Of course, this bundle tucks neatly underneath the fiberboard cover. It's a cardinal rule to never mix power and signal wires, but in this case, all the audio signal wires are heavily shielded, so there will be no problems.
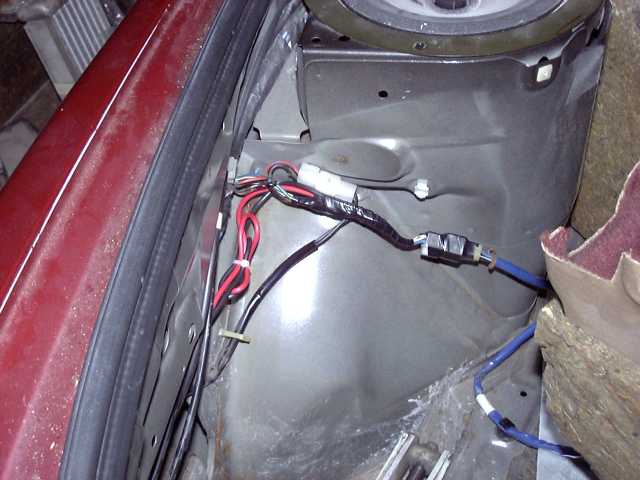
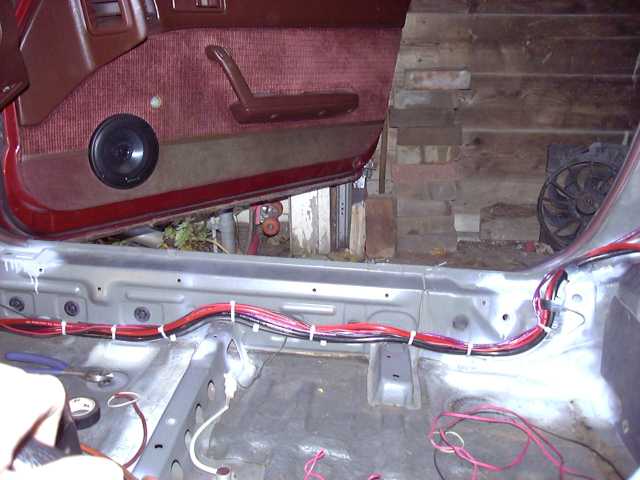
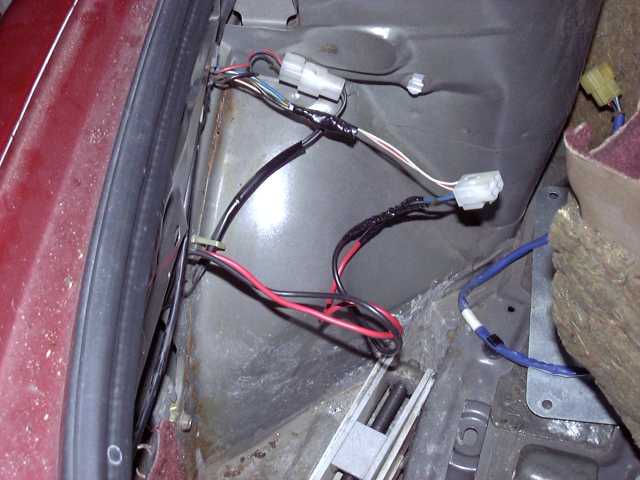
The passenger side wiring was done next. Shown here are the two thick (power and ground) battery cables, the rear passenger speaker wire, and the power and ground for the fuel pump. I prefer to ground my battery to multiple locations. This means running a large ground wire from the battery to the car in several places, and ultimately to the engine as well. Multiple GOOD grounds are vitally important. The fuel pump also has it's own separate ground, as will the ignition box and Microtech. This the only way to assure clean power to these important components.
Starting the fuel pump wiring at the pump. I'm going to be crucified for not using sealant-filled heat shrink, but I honestly just ran out. Next time I am in that area, I will correct my sloppy work.
And the fuel pump wiring is finished and tied off. Also notice that the harness plug has also been taped. I've seen these break, so any little bit of extra strength is a good thing in my books.