| Home > RX-7 > Tech/Mods > Modifications > Turbo NA Guide > Intercooler Mounting, Pipe Fabrication |
| Home > RX-7 > Tech/Mods > Modifications > Turbo NA Guide > Intercooler Mounting, Pipe Fabrication |

To install the front mounted intercooler, several of the brackets on the front support bar needed to be cut away. These included the horn brackets, and the mounting brackets for the optional electric fan. Because my car is the base model, I did not have that fan installed (it is included with cars that have A/C). Two brackets were left (one on each side) to provide a mounting location for the intercooler.

The intercooler was then mounted. Custom brackets made of 3MM steel and bent to match up with the factory brackets already on the car.
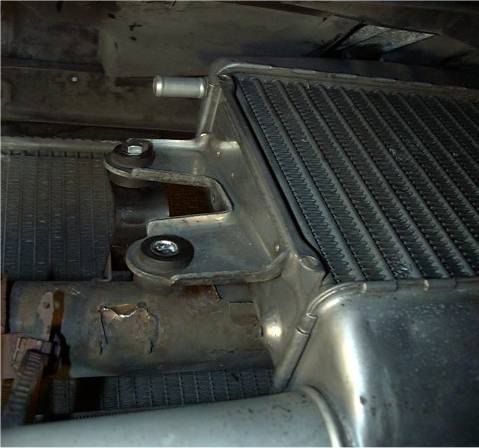
The passenger side intercooler mount.
The drivers side intercooler mounting bracket.
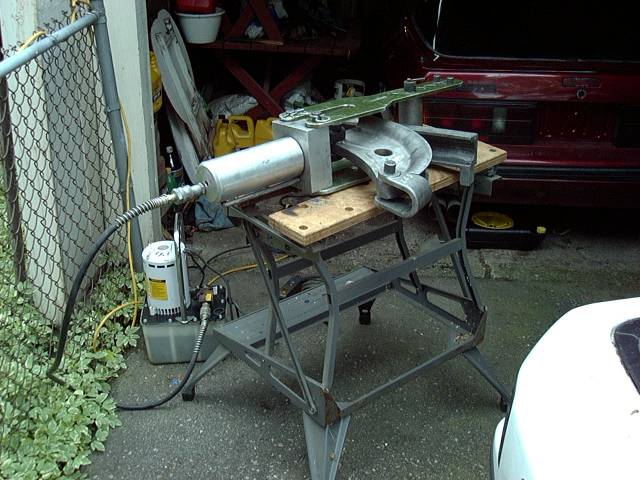
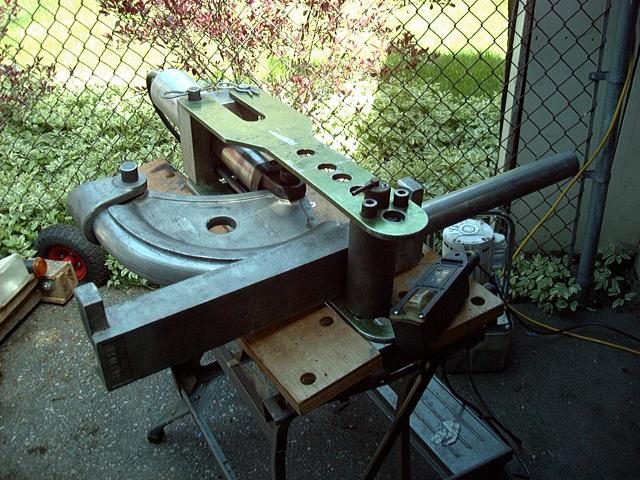
Once the intercooler was mounted, it was time to make the intercooler piping. To make the custom bends required, a tubing bender and 2" bends were rented. It was a hard item to find, but I eventually found an industrial equipment rental shop that could provide one. The price was fair, as it cost $160 for 5 days. There's a little bit of technique needed to operate it, but otherwise it's fairly straightforward. The bending process mostly involved running back and forth from the car and bending a little at a time until things lined up. You can see how difficult it would have been to have an exhaust shop make the bends due to the constant test fitting.
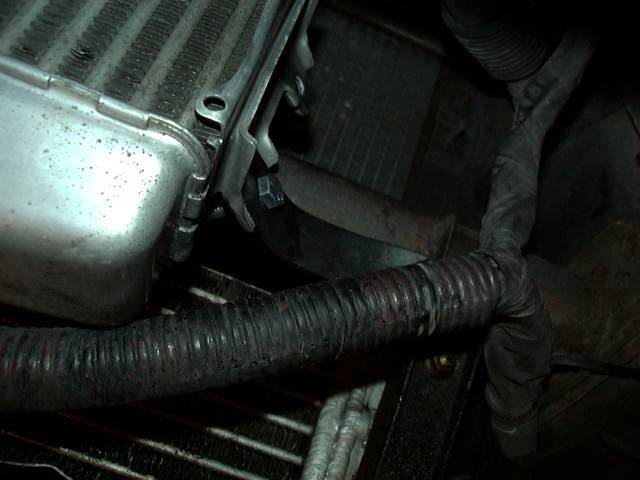
The lower intercooler pipe installed. It is bend in a shape similar to a "straightened S" or a " ~ ". To connect to the compressor output and intercooler input, 90 degree coolant hose bends were used along with hose clamps. The coolant hose bends are designed to take about 25 PSI at high temperatures, and are much cheaper than the silicon couplers usually used (if not as astetically pleasing).
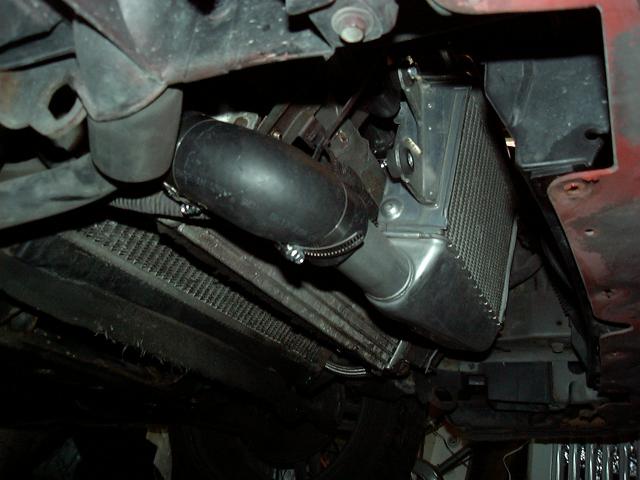
The lower intercooler pipe fit perfectly through a notch in the radiator support that was already built into the car. A 90 degree coolant hose bend was used to connect it to the intercooler. The plastic belly pan of the car would need to be modified to fit over the bend.
Once the lower pipe was done, the upper pipe was bent. A 90 degree bend was put in, but later cut down to about 40 degrees during fitting.
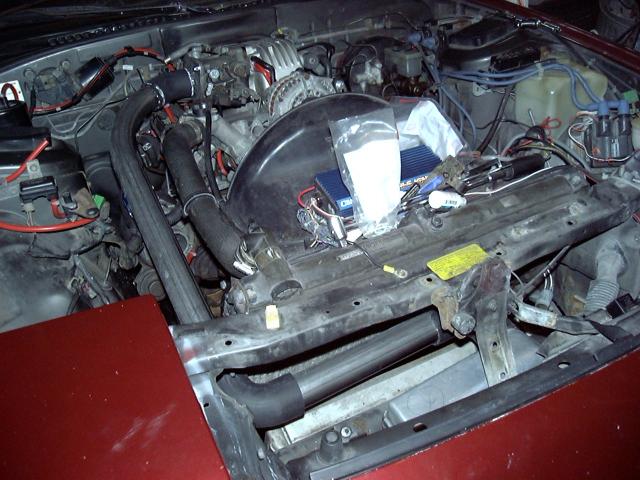
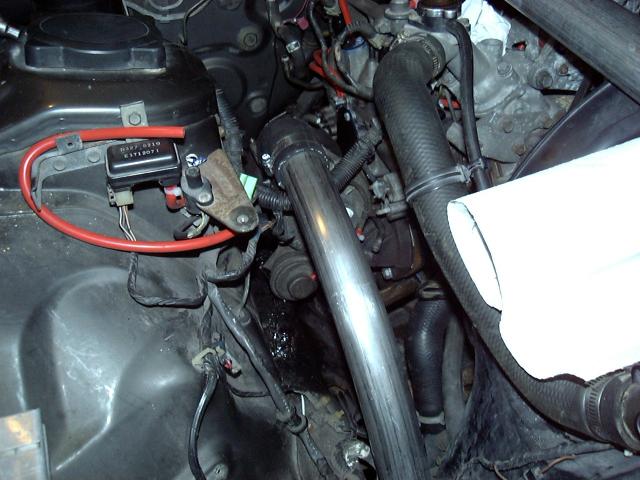
The upper pipe was then put in place. You will notice that an older unfinished version of The Strawberry is shown here. It was painted after the intercooler pipes were installed. In the nose of the car, 2 ninety degree bends were used along with a shorter section of pipe to connect the intercooler outlet to the upper pipe. On final assembly, everything was clamped into place. However, since the upper pipe would have to be removed to install the BOV and install oil and water lines to the turbo, clamps were not installed at this time.
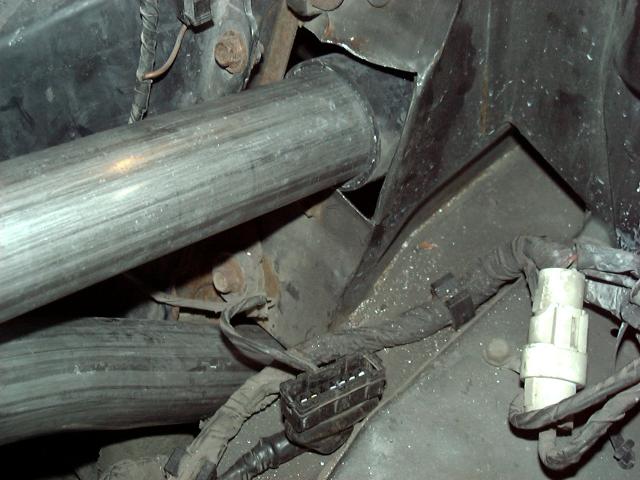
Holes were cut in the radiator support to allow the intercooler pipes to pass through.
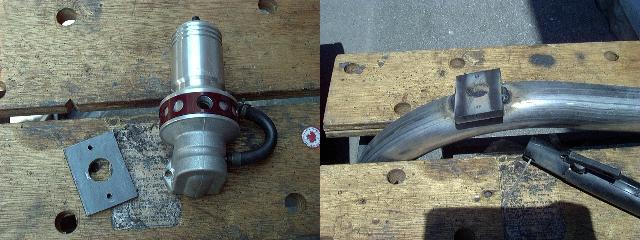
To mount the Apex'I BOV, the upper intercooler pipe was removed and a flange constructed out of 5MM steel. It was drilled to match the mounting flange on the BOV, and the holes were tapped to accept the machine screws that were used to attach the BOV. Bolts could not be used because the body of the BOV sits too close to the flange. The homemade flange was then welded onto the upper intercooler pipe, and a hole drilled through the weld (the center hole on the flange was filled with metal to assure an airtight seal between it and the pipe) and pipe. This hole took quite a bit of effort to drill, since the welding had the effect of heat-hardening the metal. Large amounts of water was used to assist the large drill bit in cutting the hole.