| Home > RX-7 > My RX-7 > Project Tina > Project Tina, June 2nd, 2010: Rear Suspension Reassembly, Another Resonator, Front End Rebuild |
| Home > RX-7 > My RX-7 > Project Tina > Project Tina, June 2nd, 2010: Rear Suspension Reassembly, Another Resonator, Front End Rebuild |
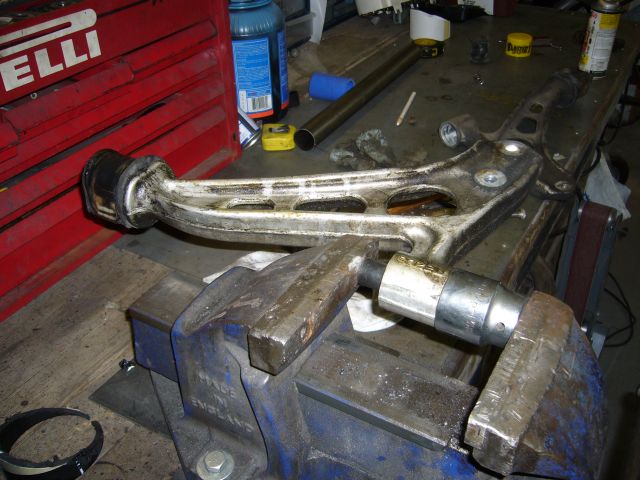
Now, it is time to move to the neglected front end. With 270K on the chassis, every bit of the front end suspension/steering was well past worn out. Bearings have been worn for 100K or so, bushings were a disaster, tie rods were loose, etc. The first step was do disassemble it all. Then, as I enjoy pushing out bushings, I removed the bushings from the front control arm. This is in most cases fairly easy to do with a large vice and a selection of sockets and tubing. The rear pivot bushing was just cut off with a Sawzall.
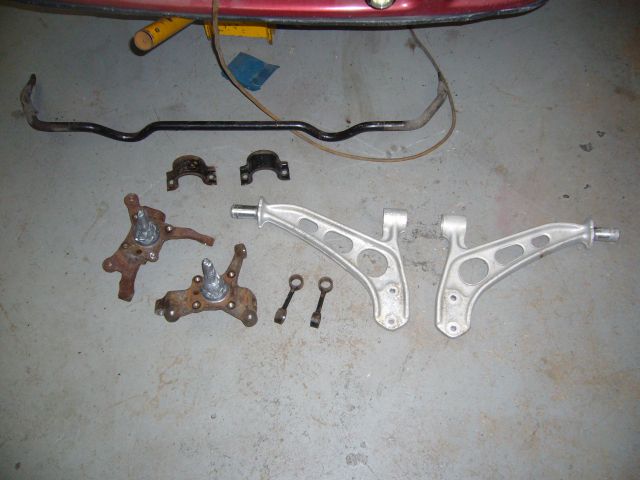
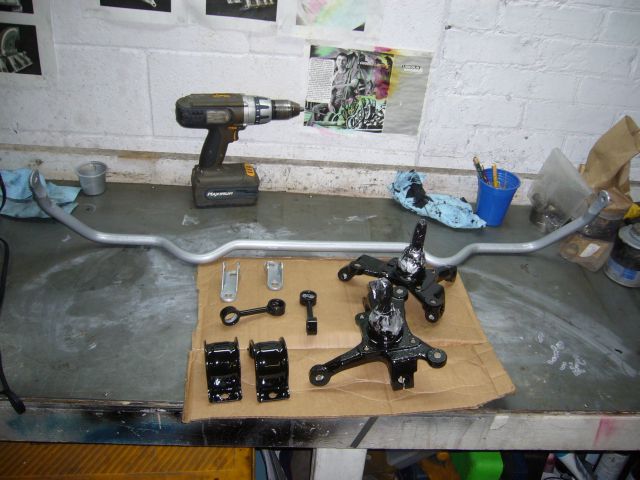
All the front end stuff was prepared for blasting. Everything in this image was blasted (as well as the sway bar end link mounts, not shown) except the control arms. They just got a quick cleanup on the wire wheel.
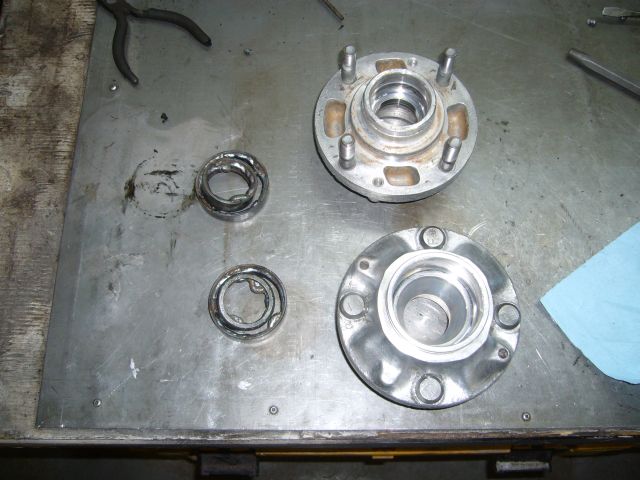
Removing bearing races from 2nd gen front hubs is very easy, if you know the trick. There is no need to risk damaging the hub by grinding out an area to use a punch, like many of the vendors suggest. If you have access to a MIG welder (and almost everyone does in some way or another), then you can have the races out in a few minutes. Clean up the hub and remove all the grease. Then, weld a few "ears" inside the bearing race. Then run a full bead along the inside of the race to get it nice and hot. Once the hub is fully cool, just bang it on the bench a few times and the race will drop out. If you need to use a punch, then punch against the little ears you have welded in (this picture shows three). If you are careful with the welder, there is no risk in damaging the hub.
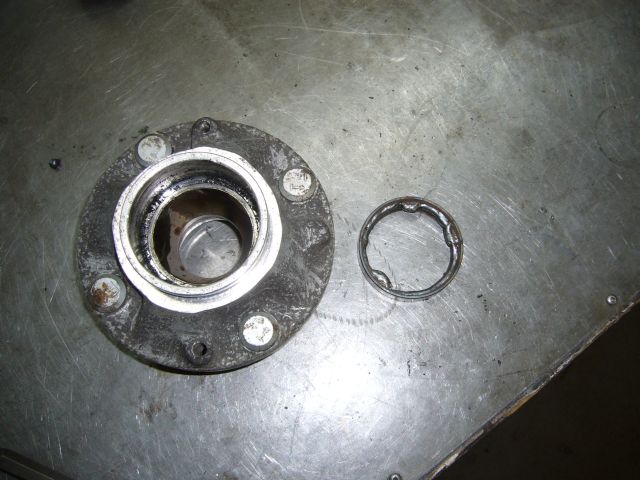
How does this trick work, you ask? Well, molten metal (from welds) shrinks as it cools. So the bead heats up the bearing race and as the weld cools, the race shrinks inward ever so slightly. The heat also breaks any bond the race has with the hub so it is free to fall out once cooled. But make sure to let the hub cool fully, because aluminum expands much more then steel and will actually jam the race in place if you try to remove it when still hot.
While the hubs were cooling down I installed the new poly bushings in the front control arms. I actually felt kind of dirty plunging my lubricated fingers again and again into the tapered rear bushing hole. The control arm slipped into the well lubricated hole with very little encouragement needed.
Speaking of lubrication, is anyone else totally annoyed by the weird lube included with the Energy Suspension poly bushings? At the same time it manages to be both slippery and sticky while possessing some kind of unholy staying power. Get one drop of it on something, and it will be slippery/sticky forever. The only thing that seems to take it off is thinner.

The front end stuff was painted in POR-15. I much prefer the coverage of black POR-15 to that of silver but since I had an open can of silver (once a can is opened, its shelf life is limited) I figured I would paint the front stabilizer bar to match the rear.
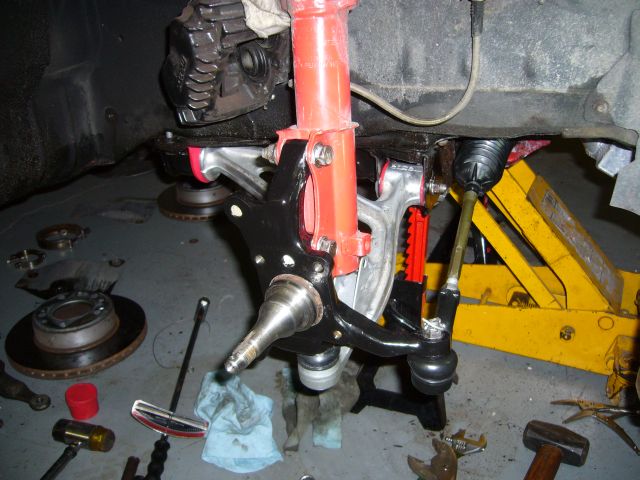
I then reassembled the front end. The ball joints and tie rod ends (inner and outer) are brand new. If you are doing this job, do not damage the rubber tie rod to steering rack boot. They don't seem to be available anywhere. Luckily I had a spare FC front subframe in the basement I was able to pull one from.
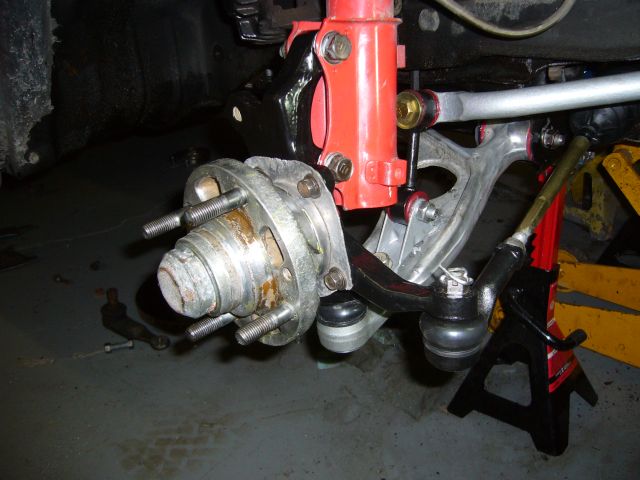
Once the new bearings were packed and installed on the front hubs, they were reinstalled onto the car. I packed them with loads of Castrol high-temp bearing grease. Remind me to look at another set of hubs to see if there is an easy way to install a grease nipple. At the same time, I bolted up the stabilizer bar. All new hardware, of course. Note that I cut away the brake rotor dust shield. It was in terrible shape and since it had to be trimmed to fit the larger 4 piston rotors anyway, I figured I would just make it go away. I can handle a little more dust on my brakes. :) The center part was kept because it provides shielding to the grease seal at the back of the hub.
When I originally installed the GT40R, I covered the turbine housing with a DEI turbo blanket. It looked awesome...for about a week. After that, the aluminum coating began flaking off. After a few more months, it was just a naked piece of heat wrap surrounding the turbo. It continued to deteriorate to the point where it was starting to just fall apart. Additionally, it really was not a good insulator. Everything in the area was still being baked by heat and with the proximity to the secondary injector and fuel hoses, I have never been happy about the situation. A lot of people have been very happy with the PTP turbo blankets and from what I have seen of them, the quality is very high. So I ordered one from PTP's eBay store and it arrived about a week later. I'm quite impressed with the materials used and the quality of the item.
![]()
I thought it was going to be a real pain in the ass to install this thing, but actually, it was rather easy. After I removed my oil feed hose the blanket rolled right onto the turbine housing. The only slightly annoying part was using the supplied stainless steel safety wire to secure the blanket. Trying to twist that stuff in an area of limited access was not fun, and the wire is quite sharp at the ends.
![]()
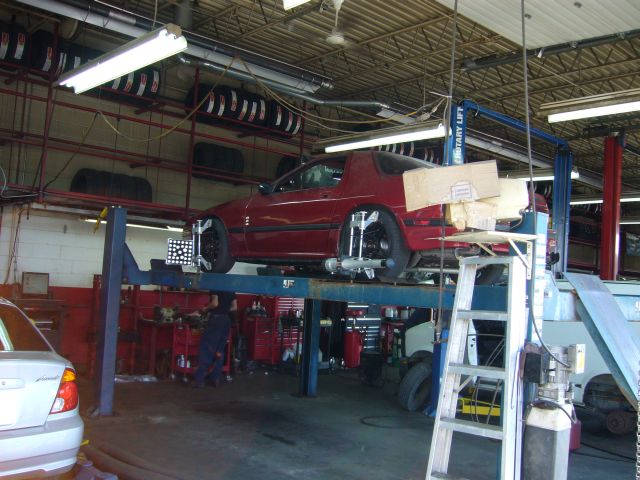
Because the entire suspension was disassembled, the car needed to be totally realigned. Actually, the car has needed an alignment since I've owned it but I have not bothered knowing that the effort would have been pointless with the worn out suspension. I did the best I could to line up the front wheels with a tape measure and then drove to my friendly neighborhood garage where the car as put up on the rack and properly set up.
After all this work, the car drives better then new. And it should, considering that there is a better then new drivetrain underneath it. No more clunks, rattles, grinding, floppy steering or pulling. I'd love to give an accurate evaluation of the DTSS elimination, but I don't think I can. Since I changed everything else at the same time, the car feels nothing like before. However I think I can say that without the DTSS, the rear feels far more conventional. I hesitate to say "predictable" because I always liked how the DTSS would make the car turn in, and I learned to drive with it instead of against it. Now, the rear end feels kind of "limp" and some throttle is necessary to bring it into line. I think this is what most drivers would want, but I'm still on the fence about it.
What's next? Well, not too much. Sometime this summer I will need to book some dyno time to fine tune at 16 PSI. I did some crude street tuning at that boost last year but there is little that can be done on the street at these power levels while remaining legal and safe. And ultimately, I want to have a dyno sheet showing 501 RWHP.
My rear quarter panels are a bit rough (a consequence of the car spending 12 years in Canadian winters before I bought it) so I need to put some thought into what will be done. On the one hand, a set of new Mazda quarters can be welded in and then the car repainted. On the other hand, a complete wide body is looking more and more appealing. The wide body, however, is a fairly large commitment. Whatever the solution, it won't be for a while because I have some other projects that need attending to.