| Home > RX-7 > My RX-7 > Project Tina > Project Tina, September 20th, 2006: Gauges, Intercooler and Piping, Final Assembly and Startup |
| Home > RX-7 > My RX-7 > Project Tina > Project Tina, September 20th, 2006: Gauges, Intercooler and Piping, Final Assembly and Startup |
I'm sad to say that this will be the last installment for a while concerning my ongoing project. For you see, there's not really a lot for me to do right now. The weekend of Sept. 17th was a major turning point in that I started the car for the first time. Therefore, at the moment, all I can do is drive and tune it until the engine is broken in...But I'm getting ahead of myself.
This thread contains the final 49 pictures leading up to the first startup of the engine. At the end, you will find the associated videos. Please read the entire thread before downloading the videos. It will set you up for what you see on the video. There's a lot of info here so as pretty as the pictures are, it's important to read the text that goes along with them as it almost always explains why I did something the way I did, made a particular choice, etc.
We last left off painting the catback. I used POR-20 high temp paint to give the full stainless exhaust that sort of silver-aluminum look. Also it will help keep rust off the welds.

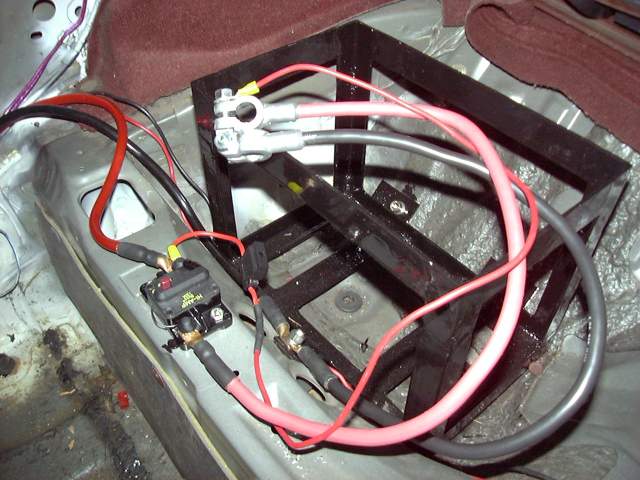
With the exhaust drying (the drying process for POR-20 is truly bizarre) I was in a bit of a wiring mood so I set up the breaker and battery cables. The breaker is a 150 AMP Cooper-Bussmann unit that I have had good success with in other cars. Even though it's rated at 150A, it will stand up to excessive cranking just fine (I've never popped one doing so) yet still trip in the event of a direct short. Thankfully I have never had to test that. The breaker also includes a manual trip switch to cut all power to the car. Those who know what the fuse is bypassing the breaker will know that it is an important security measure. The rest of you can figure it out on your own.
With the spectacular failure of my copper heater pipes, I needed some kind of heater hose. The stock hose had caused no end of problems for me because no matter how new it was, no matter how careful I was to keep oil off of it and not over tighten the clamp, it failed about once a year. You can only be stranded at the side of the road a few times before you start thinking of ways to eliminate the problem. So the hose I used is a silicone based hose made by Thermopol. It is not the least bit cheap but it's thick high temperature silicone and internal fibre braiding mean that it will probably last the life of the vehicle. Of course, the hose clamps are T-bolt style.
Here's the passenger side heater hose as it connects to the rad.
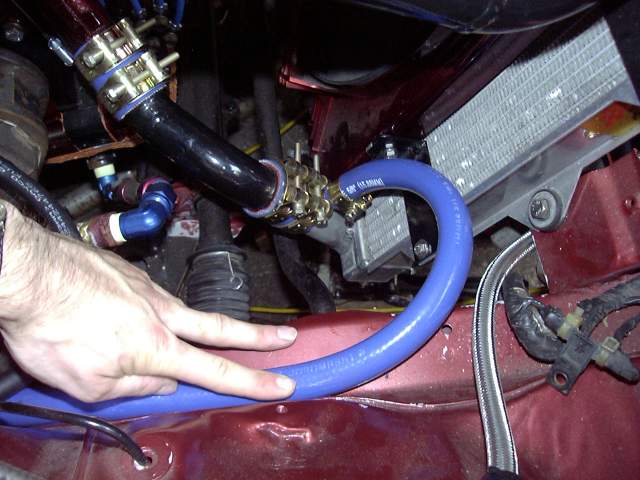
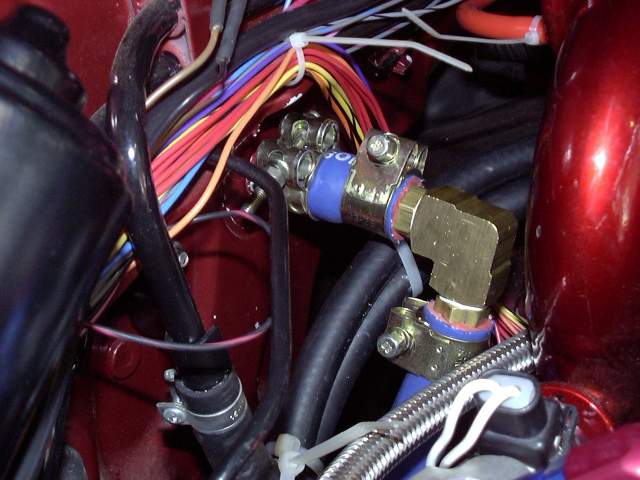
And the connection at the firewall. The tight fit required a 90 degree fitting. I purchased some large brass nipples and 90 degree threaded el from the local hydraulic store. Yes, there's a paint chip in my manifold. Damn...
The gauges I chose are AutoMeter's new Nexus line. I first saw these things demonstrated by AutoMeter at Detroit AutoRama 2005. The moment I saw them, I knew that they were the perfect gauge for the RX-7. These gauges are AutoMeter's first really new gauge in a long time. They are all fully electrical, with modern senders and a central control box. Not only does this allow fancy (though kind of useless) things like 7 colour lighting, custom startup and shutdown sequences, demo mode and a few other goodies, but it allows truly useful additions like data logging and a massive reduction in the amount of wires going to each gauge. All the senders connect to the control box, and then a single cable leads from the box to the first gauge. This cable carries power, ground and signal to the gauge. Each successive gauge then plugs into the previous gauge. The three gauges shown here are the "secondary" gauges; oil temp and pressure, and fuel pressure.

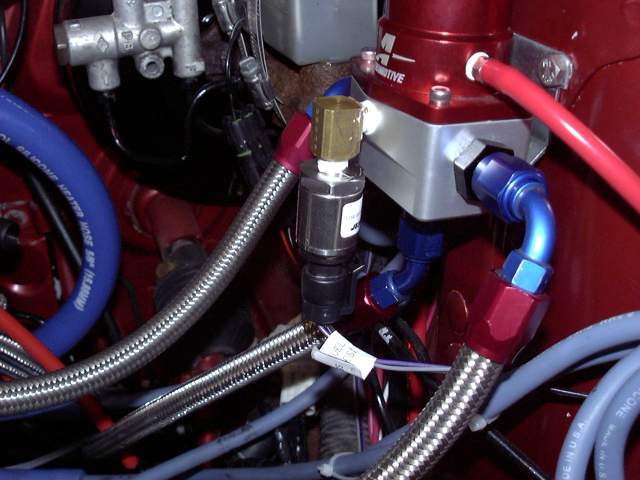
The first task was to mount the fuel pressure sender. The Aeromotive regulator provides a 1/8" NPT fuel pressure port so it was a simple matter to attach the sender using a 90 degree fitting. The 90 degree turn prevents the sender from sticking far into the engine bay. Notice the new style sender with proper WeatherPack style connectors. Kudos to Autometer for making the right choice for hookup, and including a small tube of dielectric grease with every gauge.
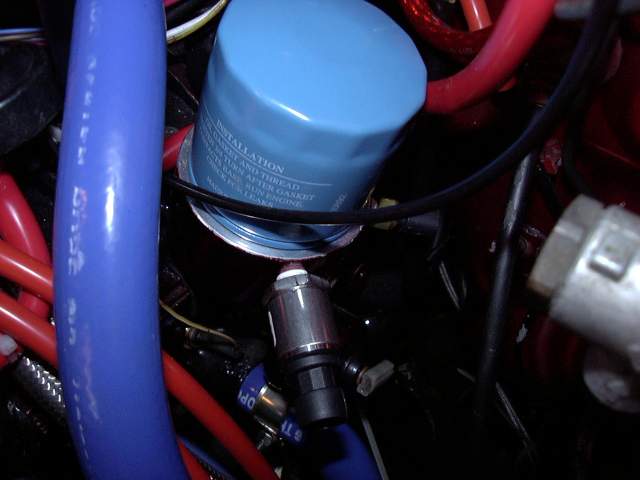
Next the senders for the oil pressure and temperature gauges were installed. Again they just screwed into the 1/8" NPT ports provided on the Speed Machine oil pedistole. A little Teflon sealing compound prevents leaks down the threads. At the same time I disassembled the WeatherPack connectors, packed them with dielectric grease, then reassembled.
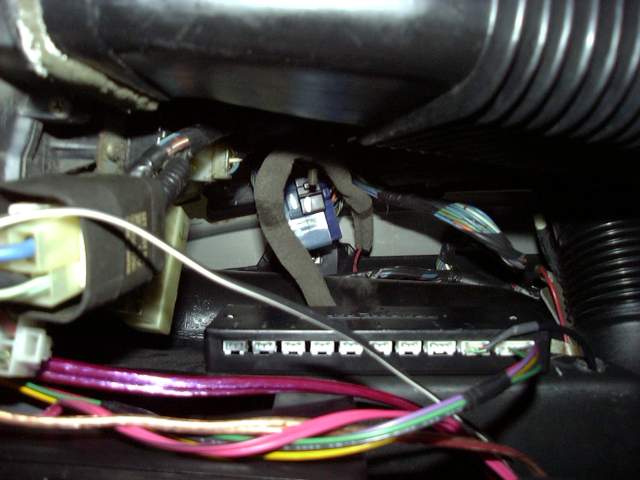
The control box comes with a remote to operate it's functions, but I didn't want it stuck to the dash somewhere. So the glove box was an ideal location. Velco strips hold it to the side.
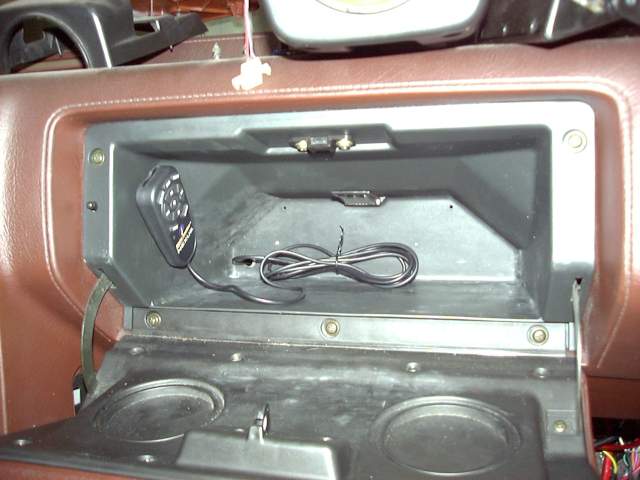
There's actually a lot of space behind the glove box and it seemed like a perfect location for the Nexus control box. Mounting it was easy as there are provided screw holes and self-tapping screws included. The two harnesses that plug into it are for the power/ground/IGN/RPM hookup (it also has a tach out feature) and remote.
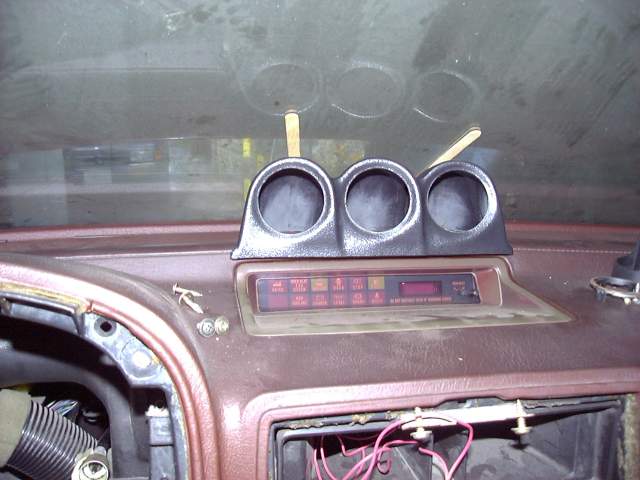
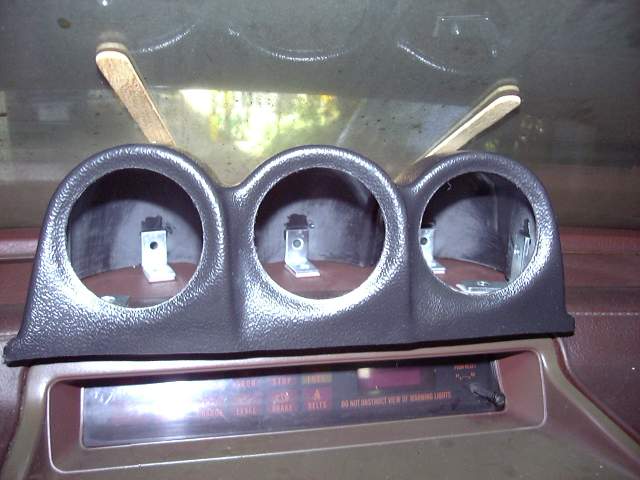
One of my major annoyances when I see any kind of modded cars are gauges strewn about the cabin, gauges in the way of other gauges, or previous features (like idiot light clusters) removed to make way for gauges. Because of this I knew that I wanted to mount my secondary gauges in a way that will not interfere with another function, still be visible at a glance when driving, but not intrude into my primary field of vision. No one seems to make any gauge pods for the RX-7 besides the A-pillar pods and I already have one of those. Well there's also an idiot light cluster pod but because it replaces the idiot cluster it is not an option for me. After a little digging I found a generic APC 3 gauge pod that is almost the exact width of the idiot cluster. Trimming about 1/4" off the bottom allowed it to fit snug to the dash with about 1/8" between it's top and the windshield. Popsicle sticks hold it in place temporarily while I test the fit.
Mounting was accomplished with angle irons and 3M double sided trim tape. The angle irons attach to the inside of the pod and then get stuck to the dash. This tape is STRONG after it has cured and WILL NOT COME OFF a properly prepared surface.
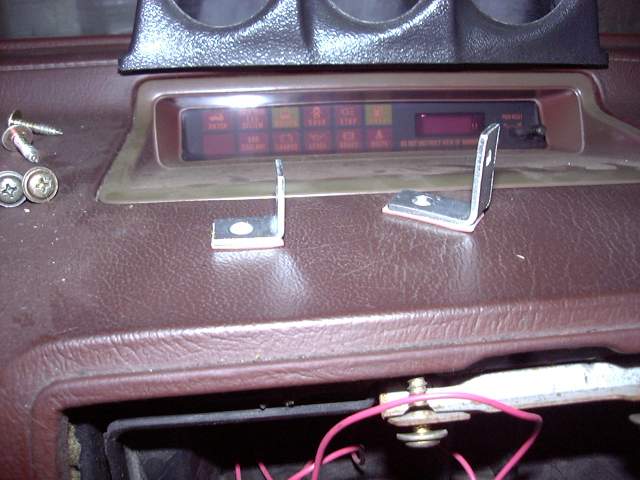
The pod was put into place and a small amount of epoxy used to "tack" the brackets where they needed to go.
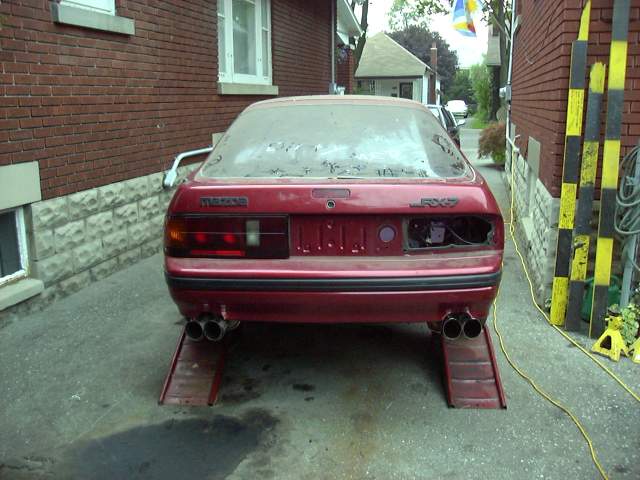
I wanted to get the car off the ramps and onto it's wheels, so I pushed it out onto the driveway and installed the catback. It fit up perfectly which was a bit of a surprise for me. Everything tends to move a little between the tacking and finish welding stages, and a millimeter of movement at one end of the exhaust means a few centimeters of movement at the other. This I assume is why most exhaust is assembled in pieces (well, that and shipping). There were no fitment issues and the pipes and mufflers ended up exactly where they were during the initial mockup. Once things were tightened down, the system was solid and rattle free.
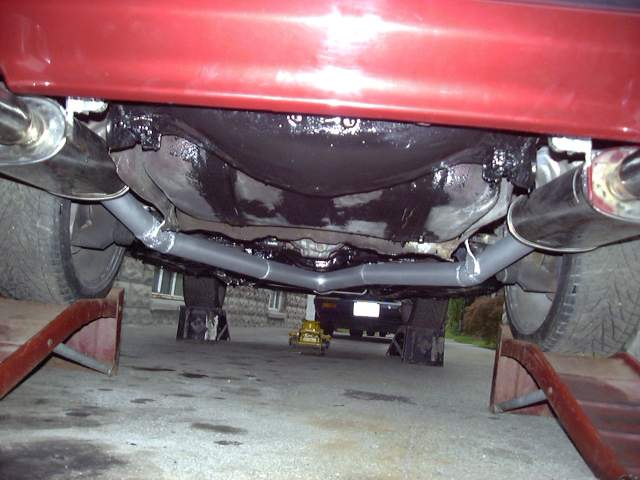
The mufflers sat even at the back of the car with exactly the right distance from the bumper. I'm very happy with the way the exhaust turned out. Say what you want about my mufflers, but I like them.
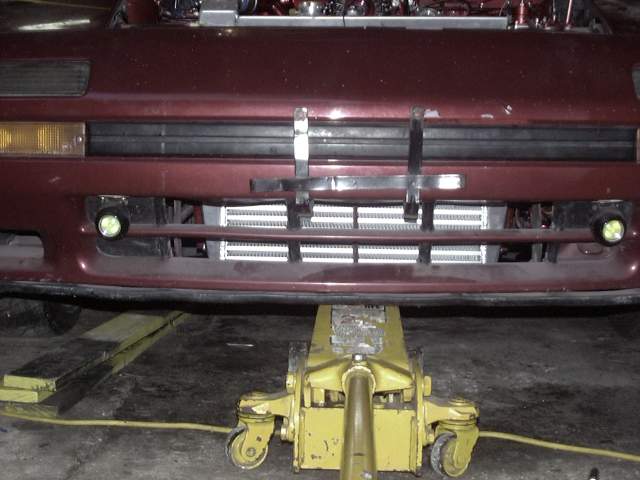
Now I could move to the front of the car and get working on the intercooler. The cooler I chose is about 14" in height by 26" in length (tank to tank) and 3" thick. I probably could have gone one size up in length but it would have meant having to cut the car which is something I wanted to avoid. In the future, the car will go back to NA at one point and I didn't want big chunks cut out of the car for nonexistent intercooler piping. I also wanted to go through the rad supports and not under the headlights. Not only would this mean something like 5 feet less of piping, but it means fewer bends and not having to ditch the washer fluid reservoir in the lower front drivers fender.