| Home > RX-7 > Tech/Mods > Mods > Megasquirt > Wire The ECU Panel, Wideband and Fuel Pump |
| Home > RX-7 > Tech/Mods > Mods > Megasquirt > Wire The ECU Panel, Wideband and Fuel Pump |
With the engine bay complete, there is still a bit of wiring needed inside the car. Starting with the ECU panel, the power and ground feeds from the battery need to be connected as do the relays. The wideband is next, followed by the fuel pump. All the wideband connections take place at the ECU panel.
For convenience, the master wiring schematics are reproduced here:
MS3-Pro
The 8 gauge red wire brings power to the fuse box. Using the appropriate size ring terminal (don't forget your dielectric grease and heat shrink) connect it to the feed stud on the fuse box. This wire is quite stiff so with some creative bending it can snake around anything that may be in its way, and hold that shape. If your fuse panel is the type I recommended with the ground board on it, connect up the black 8 gauge wire to the grounding area in the same way. If you do not have a fuse panel with a ground board, connect the black wire to a clean spare stud on the ECU bracket. From now on, this is the point (the panel or the stud) you will connect to when I say to ground something.
Time for the relays, so refer to the master wiring schematic. The first relay to wire is the master power relay that brings switched 12V power to the ECU and related equipment. But since both this relay and the fuel pump relay need a 12V switched source, connect pins 86 of both relays to the switched 12V wire you ran from the trailing coil earlier. On the relay that is now the master power relay, ground pin 85. Connect pin 30 to a 12V terminal on the fuse panel and install a 20A fuse in the corresponding slot. Now connect pin 87 to the following wires: thin red (12V) from the Megasquirt harness, 12 gauge red to the fuel injectors, 16 gauge red to the BAC, and then a short length of 16 gauge red we will use to power the wideband. MS3X/MS3-Pro users only have another 16 gauge red (power to the fan relay coil) to add to this connection. That is a lot of connections which can make a solder joint a bit unwieldy so to keep things neat, you may wish to employ a terminal block like the example shown below.
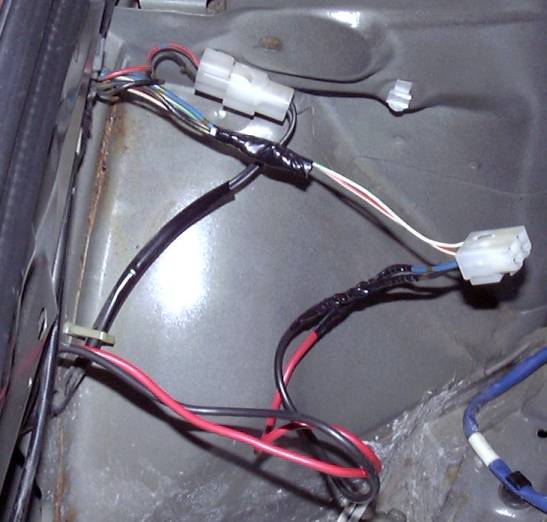
Here's an example of an ECU panel using terminal strips holding an MS3-Pro that mounts behind the glove box. The left terminal strip connects to 12V IGN from the key, while the right terminal strip connects to the main MegaSquirt relay to provide power for all the ECU related items (relay coils, injectors, BAC valve, ECU itself, etc.).

To wire the fuel pump relay, connect pin 85 to the purple wire from the Megasquirt harness. Connect pin 87 to a 12V connection on the fuse panel and install a 20A fuse in the corresponding slot. To pin 30, connect the 12 gauge red wire you ran all the way to the fuel pump.
Connect the 12 gauge red fan power wire to a spare terminal on the fuse panel and install a 30A fuse.
Connect all of the MegaSquirt grounds (black) to the ground stud/panel using the appropriate connectors. The fuse panel specified in this writeup uses quick connect spade style connectors. Studs will need to use ring terminals. Also connect the black 12 gauge fuel pump ground wire to this point. MS1 / MS2 users have one more ground connection to make here: the black 16 gauge ground wire you ran into the engine bay for the TPS/CLT/IAT.
There are only three connections to make on the wideband. Mounting the gauge physically is up to you so I will leave that to your discretion. The AEM unit specified here comes with a load of wire so you can put it basically anywhere inside the car. To connect it up, first ground the black wire at the ECU panel. You must be absolutely sure that this ground connection is good and do not be tempted to ground it anywhere but the same location as the ECU. If you ground it somewhere in the dash, a voltage offset can be introduced which will mess with the readings. Connect the red power wire from the gauge to the little power wire you left dangling from the main power relay. The last connection is the white analog output wire on the gauge to the pink (O2) wire on the Megasquirt harness. Because there are three connections to this gauge, I suggest using a connector of your choice to keep the two harnesses separate. I am partial to GM style WeatherPack connectors but you can use whatever makes you comfortable. Spade/quick connect terminals are less of a sin here because it is inside the car. Still, if you plan to use them, use dielectric grease and then seal the connection up in heat shrink tubing.
There are two connections to be made on the fuel pump; power and ground. At the rear of the car on the driver shock tower, cut the blue and black wires on the harness side of the fuel pump, leaving enough wire to make a connection. Connect the red 12 gauge wire to the blue wire leading to the pump, and then connect the black 12 gauge wire to the black wire leading to the pump. The fuel pump is now fully wired.
Now that you have finished the wiring inside the car, enjoy your favourite beverage while you examine all the connections you made and compare them to the schematic. Make sure everything is connected correctly then make another trip to the engine bay and once again check those connections. You don't want anything connected incorrectly when we apply power to the circuit.
Back To Mods Page | Mail Me | Search | ![]()